Category Archives: Hardware

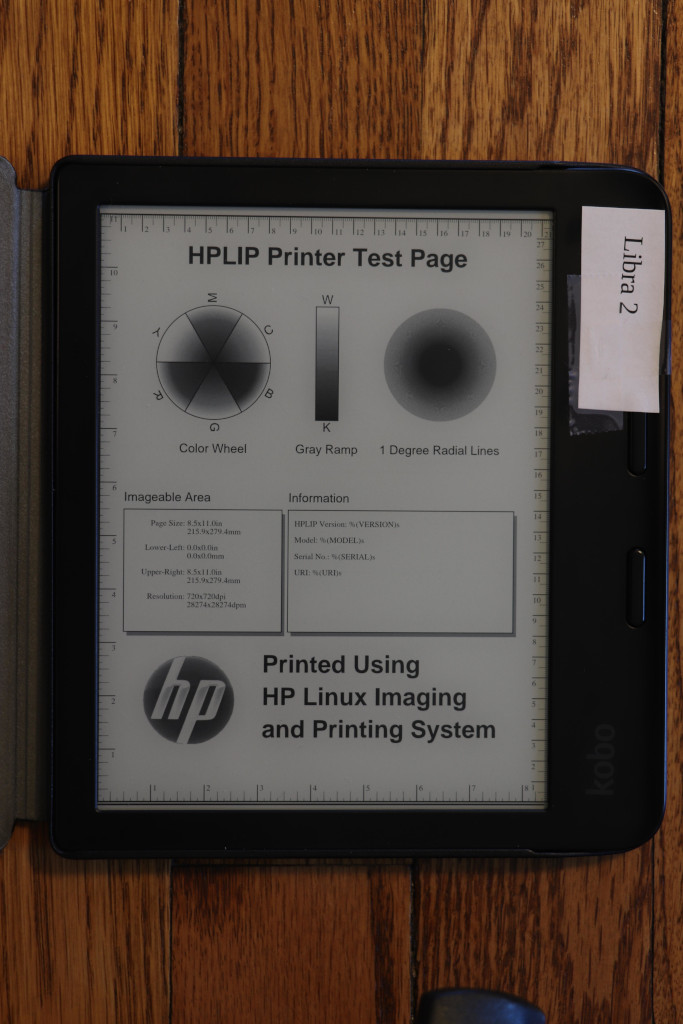
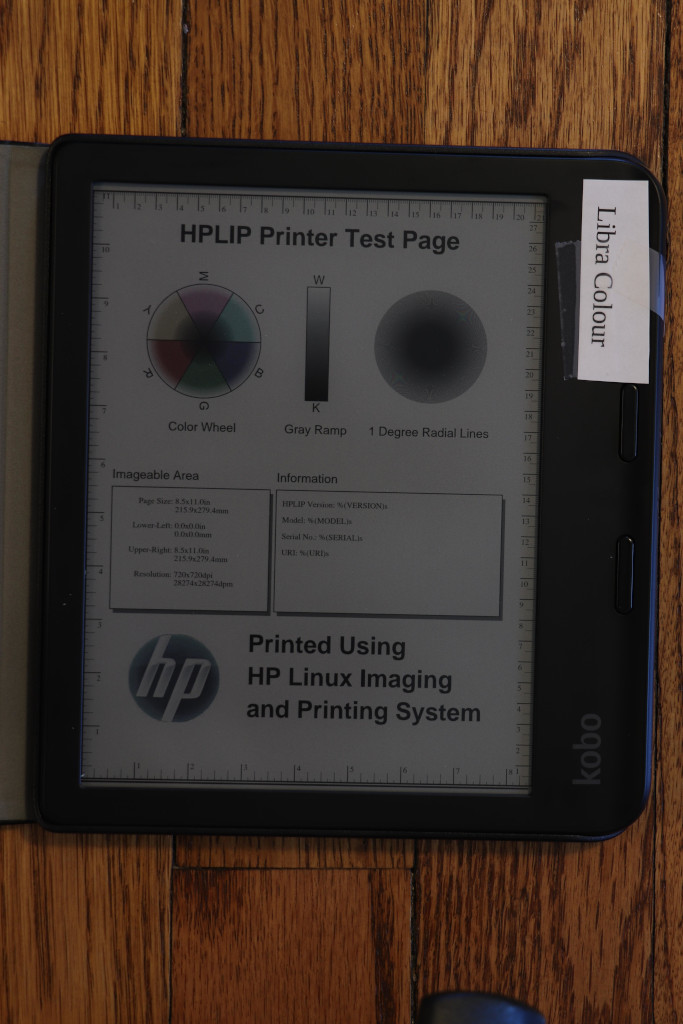
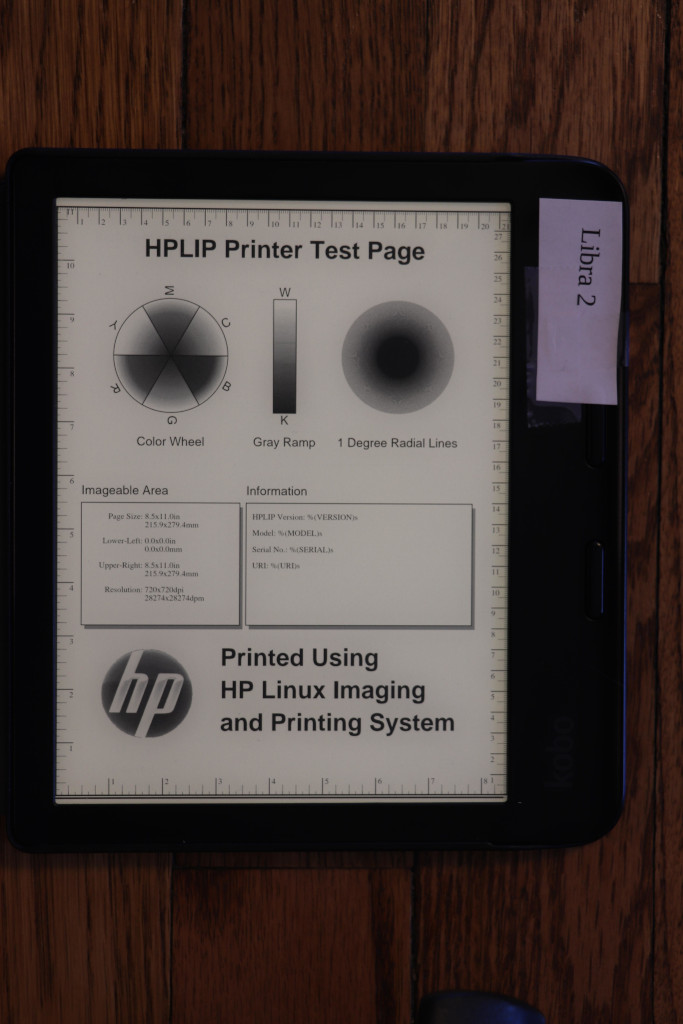
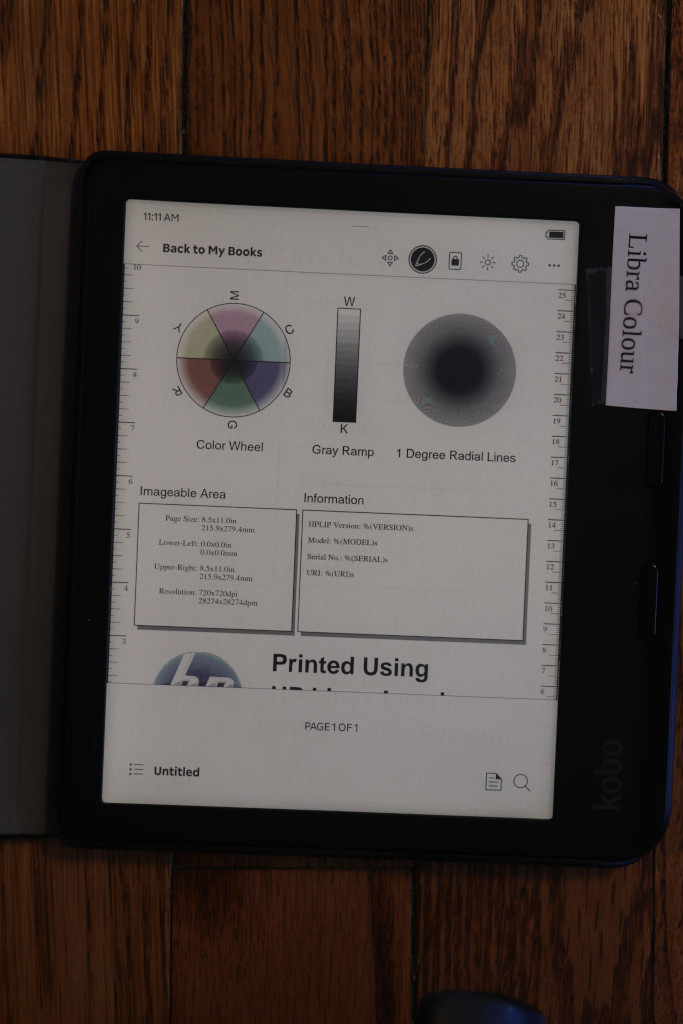
Photographic comparison: Is the Kobo Libra Colour display worse than the Kobo Libra 2?

I’ve been using E Ink-based ereaders for quite a number of years now. I’ve had my Kobo Libra 2 for a few years, and was looking forward to the Kobo Libra Colour — the first color E Ink display in a mainstream ereader line.

I found the display to be a mixed bag; contrast seemed a lot worse on B&W images, and the device “backlight” (it’s not technically a “back” light) seemed to cause a particular contrast reduction in dark mode. I went searching for information on this. I found a lot of videos on “Kobo Libra 2 vs Libra Colour” and so forth, but they were all pretty much useless. These were the mistakes they made:

  • Being videos. Photos would show the differences in better detail.
  • Shooting videos with cameras with automatic light levels. Since the thing we’re trying to evaluate here is how much darker the Kobo Libra Colour screen is than the Kobo Libra screen, having a camera that automatically adjusts for brighter or darker images defeats the purpose. Cell phone cameras (still and video) all do this by default and I saw evidence of it in all the videos.
  • Placing the two devices side-by-side instead of in identical locations for subsequent shots. This led to different shadows on each device (because OF COURSE the people shooting videos had to have their phone and head between the light source and the device), again preventing a good comparison.

So I dug out my Canon DSLR, tripod, and set up shots. Every shot here is set at ISO 100. Every shot in the same setting has the same exposure settings, which I document. The one thing I forgot to shut off was automatic white balance; you can notice it is active if you look closely at the backgrounds, but WB isn’t really relevant to this comparison anyhow.

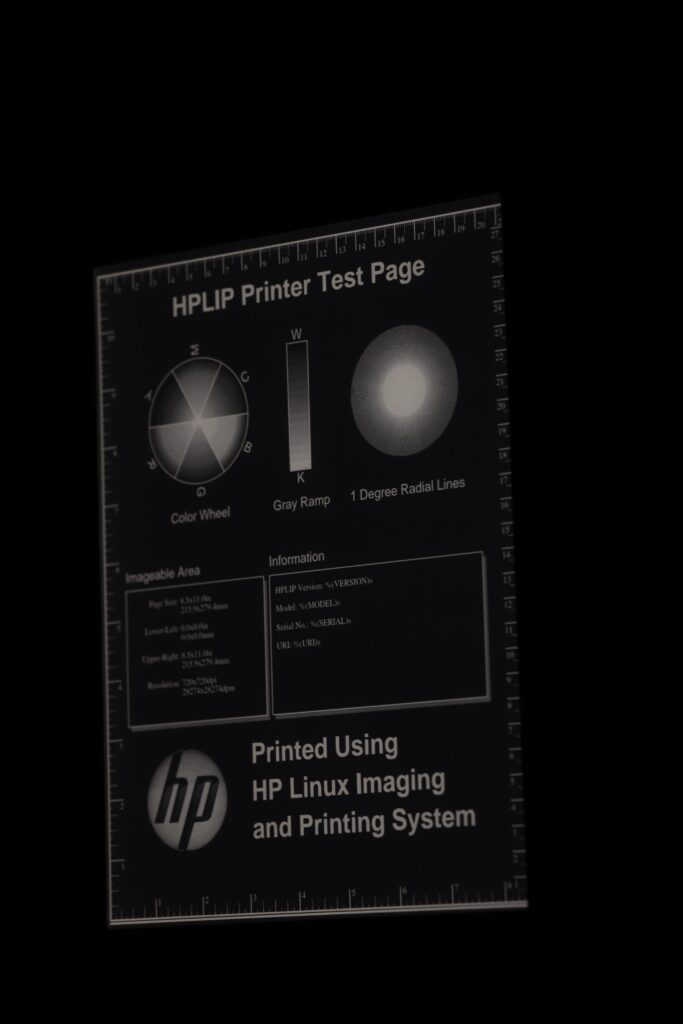
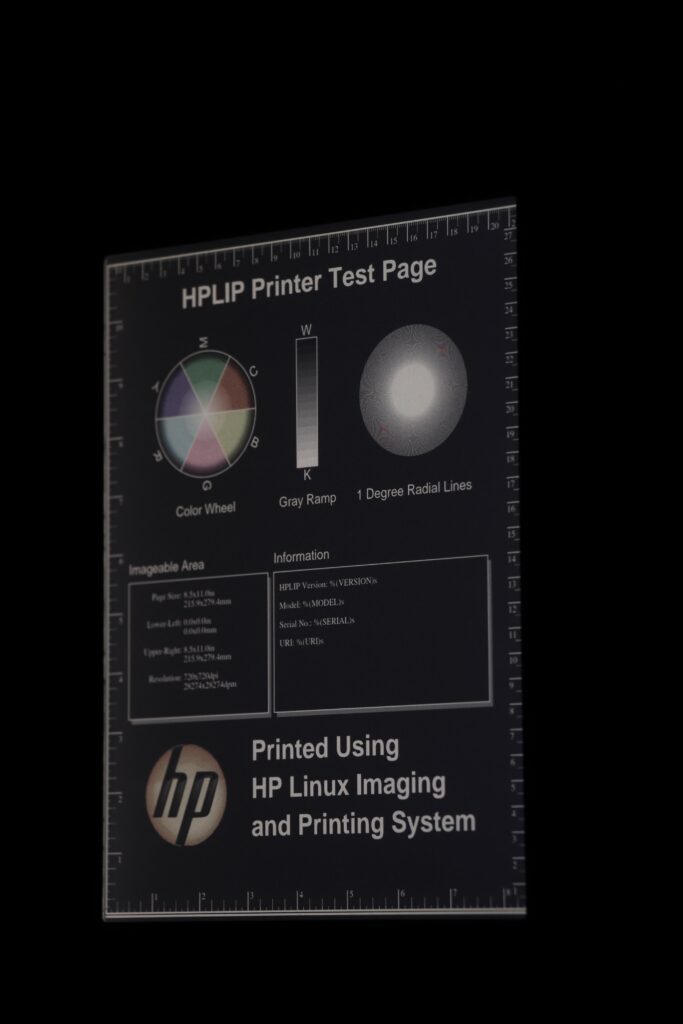
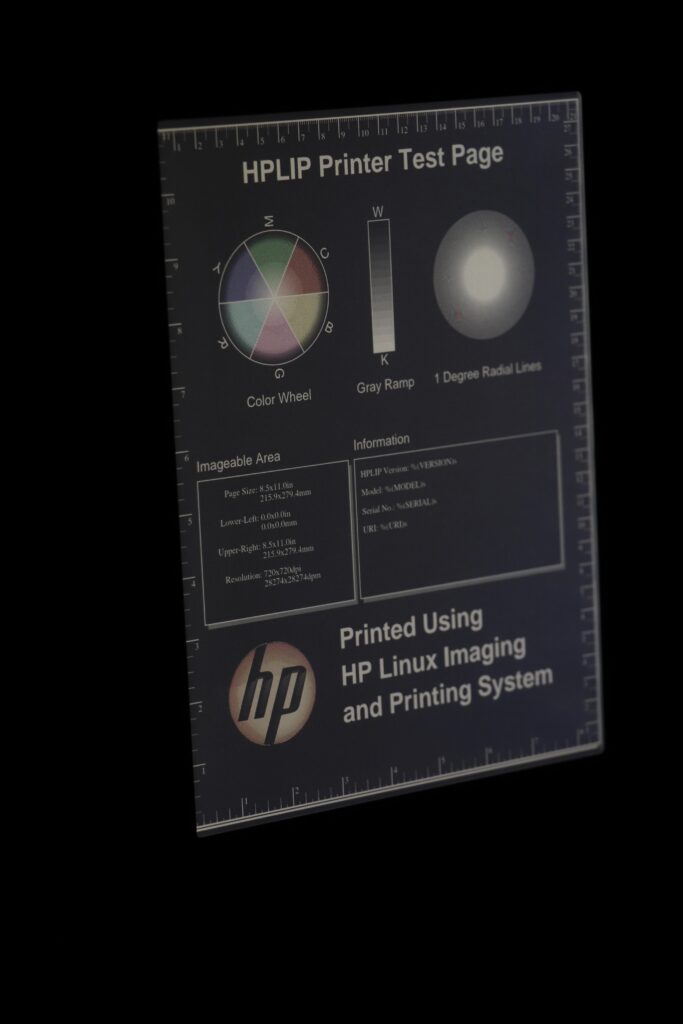
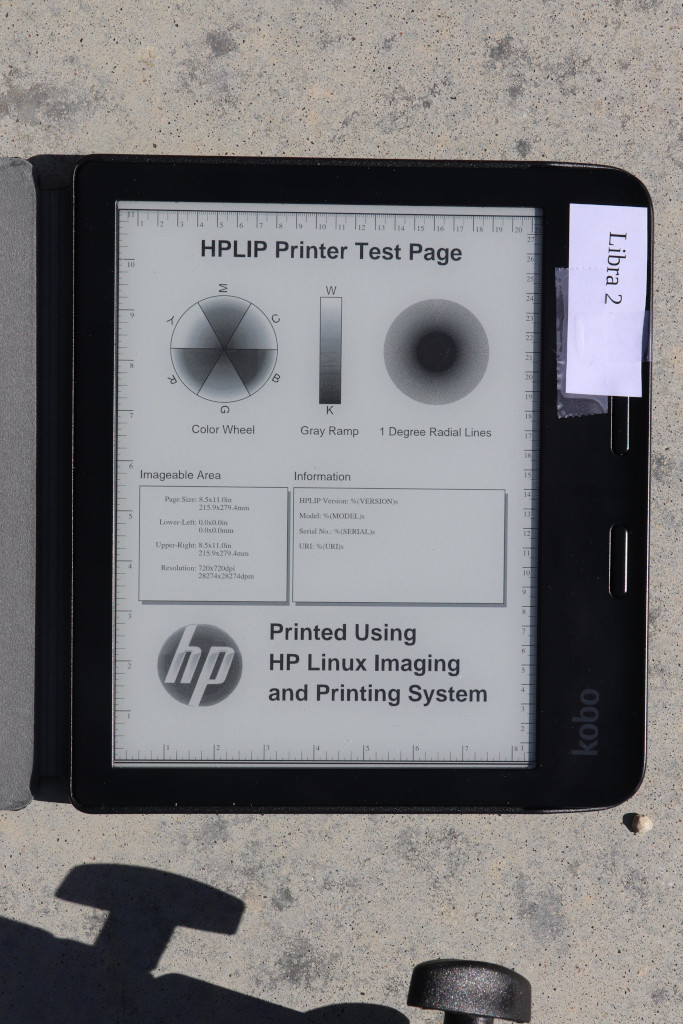
Because there has also been a lot of concern about how well fine B&W details will show up on the Kobo Libra Colour screen, I shot all photos using a PDF test image from the open source hplip package (testpage.ps.gz converted to PDF). This also rules out font differences between the devices. I ensured a full screen refresh before each shot.

This is all because color E Ink is effectively a filter called Kaleido over the B&W layer. This causes dimming and some other visual effects.

You can click on any image here to see a full-resolution view. The full-size images are the exact JPEG coming from the camera, with only two modifications: 1) metadata has been redacted for privacy reasons, and 2) some images were losslessly rotated after the shoot.

OK, onwards!

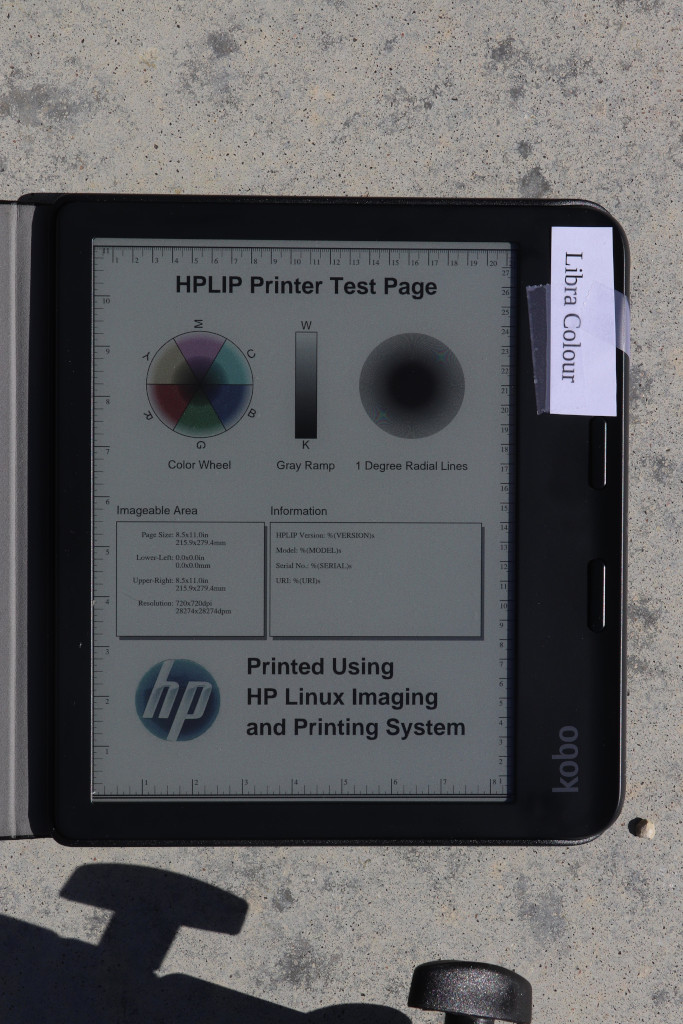
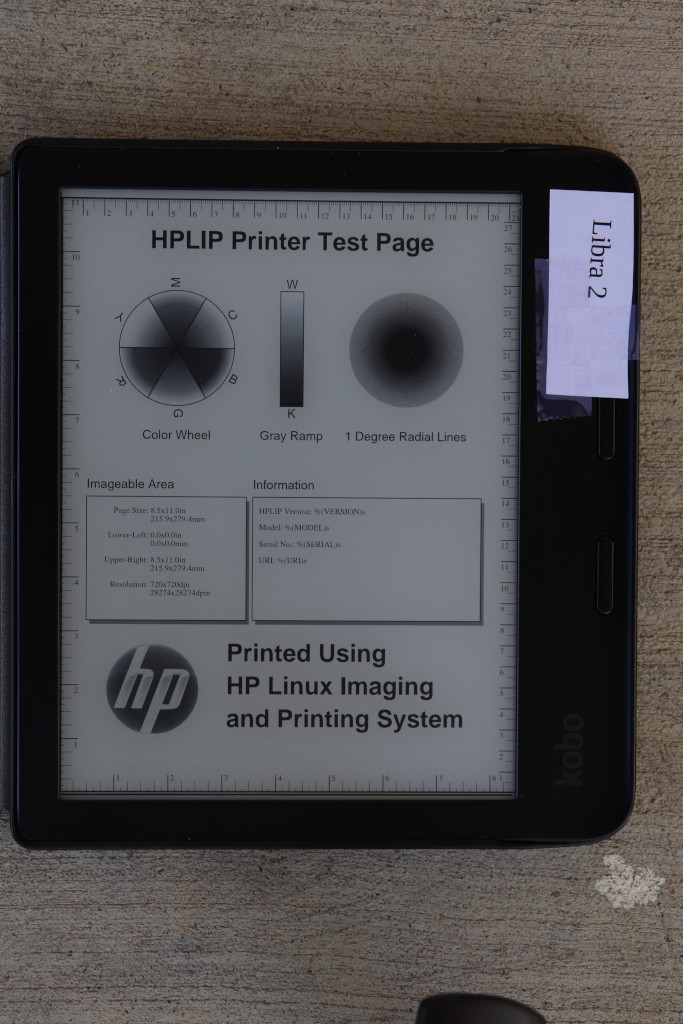
Outdoors, bright sun, shot from directly overhead

Bright sun is ideal lighting for an E Ink display. They need no lighting at all in this scenario, and in fact, if you turn on their internal display light, it will probably not be very noticeable. Of course, this is in contrast to phone LCD screens, for which bright sunlight is the worst.

Scene: Morning sunlight reaching the ereaders at an angle. The angle was sufficient so that no shadows were cast by the camera or tripod.

Device light: Off on both

Exposure: 1/160, f16, ISO 100

You can see how much darker the Libra Colour is here. Though in these bright conditions, it is still plenty bright. There may actually be situations in which the Libra 2 is too bright in direct sunlight, requiring a person to squint or whatnot.

Looking at the radial lines, it is a bit difficult to tell because the difference in brightness, but I don’t see a hugely obvious reduction in quality in the Libra 2. Later I have a shot where I try to match brightness, and we’ll check it out again there.

Outdoors, shade, shot from directly overhead

For the next shot, I set the ereaders in shade, but still well-lit with the diffuse sunlight from all around.

The first two have both device lights off. For the third, I set the device light on the Kobo Colour to 100%, full cool shade, to try to see how close I could get it to the Libra 2 brightness. (Sorry it looks like I forgot to close the toolbar on the Colour for this set, but it doesn’t modify the important bits of the underlying image.)

Device light: Initially off on both

Exposure: 1/60, f6.4, ISO 100

Here you can see the light on the Libra Colour was nearly able to match the brightness on the Libra 2.

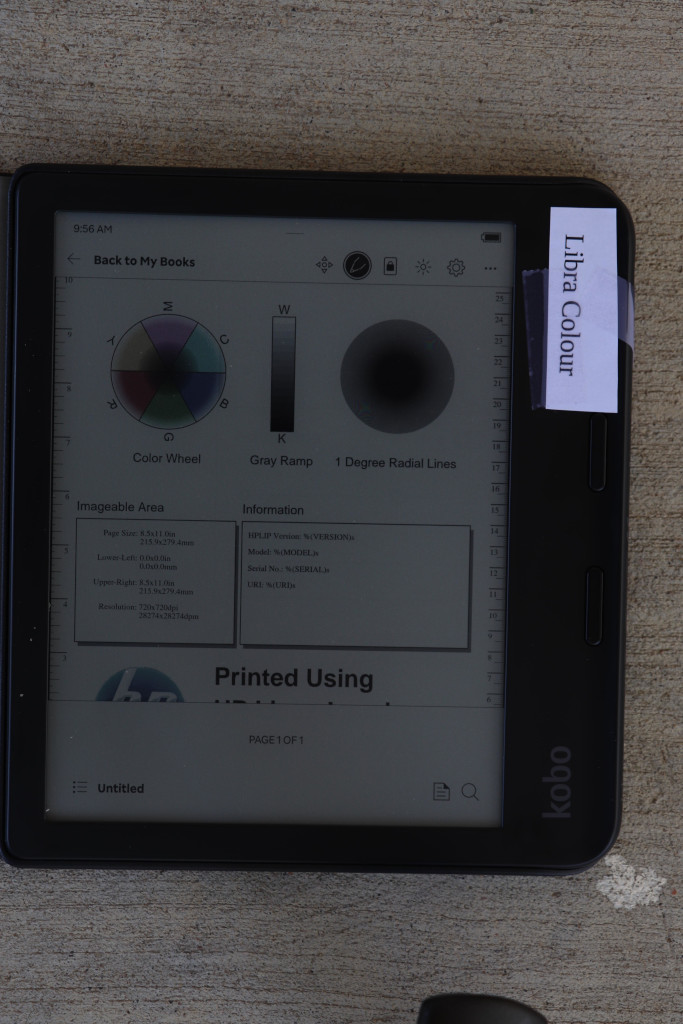
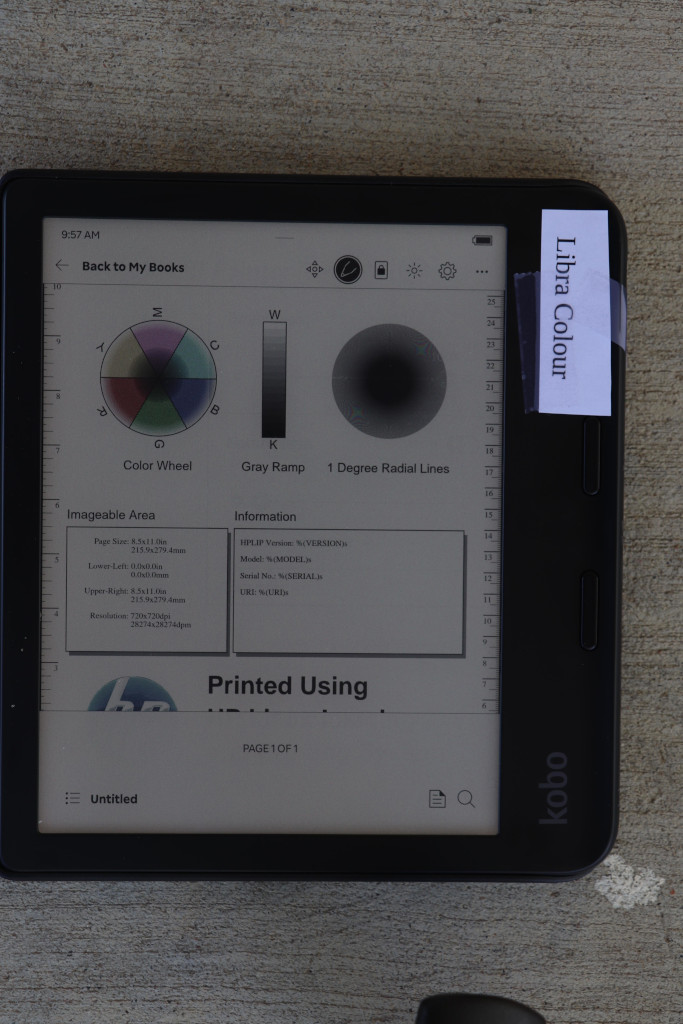
Indoors, room lit with overhead and window light, device light off

We continue to move into dimmer light with this next shot.

Device light: Off on both

Exposure: 1/4, f5, ISO 100

Indoors, room lit with overhead and window light, device light on

Now we have the first head-to-head with the device light on. I set the Libra 2 to my favorite warmth setting, found a brightness that looked good, and then tried my best to match those settings on the Libra Colour. My camera’s light meter aided in matching brightness.

Device light: On (Libra 2 at 40%, Libra Colour at 59%)

Exposure: 1/8, f5, ISO 100

(Apparently I am terrible at remembering to dismiss menus, sigh.)

Indoors, dark room, dark mode, at an angle

The Kobo Libra Colour surprised me with its dark mode. When viewed at an oblique angle, the screen gets pretty washed out. I maintained the same brightness settings here as I did above. It is much more noticeable when the brightness is set down to my preferred nighttime level (4%), or with a more significant angle.

Since you can’t see my tags, the order of the photos here will be: Libra 2 (standard orientation), Colour (standard orientation), Colour (turned around.

Device light: On (as above)

Exposure: 1/4, f5.6, ISO 100

Notice how I said I maintained the same brightness settings as before, and yet the Libra Colour looks brighter than the Libra 2 here, whereas it looked the same in the prior non-dark mode photos. Here’s why. I set the exposure of each set of shots based on camera metering. As we have seen from the light-off photos, the brightness of a white pixel is a lot less on a Libra Colour than on the Libra 2. However, it is likely that the brightness of a black pixel is about that same. Therefore, contrast on the Libra Colour is lower than on the Libra 2. The traditional shot is majority white pixels, so to make the Libra Colour brightness match that of the Libra 2, I had to crank up the brightness on the Libra Colour to compensate for the darker “white” background. With me so far?

Now with the inverted image, you can see what that does. It doesn’t just raise the brightness of the white pixels, but it also raises the brightness of the black pixels. This is expected because we didn’t raise contrast, only brightness.

Also, in the last image, you can see it is brighter to the right. Again, other conditions that are more difficult to photograph make that much more pronounced. Viewing the Libra Colour from one side (but not the other), in dark mode, with the light on, produces noticeably worse contrast on one side.

Conclusions

This isn’t a slam dunk. Let’s walk through this:

I don’t think there is any noticeable loss of detail on the Libra Colour. The radial lines appeared as well defined on it as on the Libra 2. Oddly, with the backlight, some striations were apparent in the gray gradient test, but I wouldn’t be using an E Ink device for clear photographic reproduction anyhow.

If you read mostly black and white: If you had been using a Kobo Libra Colour and were handed a Libra 2, you would go, “Wow! What an upgrade! The screen is so much brighter!” There’s little reason to get a Libra Colour. The Libra 2 might be hard to find these days, but the new Clara BW (with a 6″ instead of the 7″ screen on the Libra series) might be just the thing for you. The Libra 2 is at home in any lighting, from direct sun to pitch black, and has all the usual E Ink benefits (eg, battery life measured in weeks) and drawbacks (slower refresh rate) that we’re all used to.

If you are interested in photographic color reproduction mostly indoors: Consider a small tablet. The Libra Colour’s 4096 colors are going to appear washed out compared to what you’re used to on a LCD screen.

If you are interested in color content indoors and out: The Libra Colour might be a good fit. It could work well for things where superb color rendition isn’t essential — for instance, news stories (the Pocket integration or Calibre’s news feature could be nice there), comics, etc.

In a moderately-lit indoor room, it looks like the Libra Colour’s light can lead it to results that approach Libra 2 quality. So if most of your reading is in those conditions, perhaps the Libra Colour is right for you.

As a final aside, I wrote in this article about the Kobo devices. I switched from Kindles to Kobos a couple of years ago due to the greater openness of the Kobo devices (you can add things like Nickel Menu and KOReader to them, and they have built-in support for more useful formats), their featureset, and their cost. The top-of-the-line Kindle devices will have a screen very similar if not identical to the Libra 2, so you can very easily consider this to be a comparison between the Oasis and the Libra Colour as well.

For the First Time In Years, I’m Excited By My Computer Purchase

Some decades back, when I’d buy a new PC, it would unlock new capabilities. Maybe AGP video, or a PCMCIA slot, or, heck, sound.

Nowadays, mostly new hardware means things get a bit faster or less crashy, or I have some more space for files. It’s good and useful, but sorta… meh.

Not this purchase.

Cory Doctorow wrote about the Framework laptop in 2021:

There’s no tape. There’s no glue. Every part has a QR code that you can shoot with your phone to go to a service manual that has simple-to-follow instructions for installing, removing and replacing it. Every part is labeled in English, too!

The screen is replaceable. The keyboard is replaceable. The touchpad is replaceable. Removing the battery and replacing it takes less than five minutes. The computer actually ships with a screwdriver.

Framework had been on my radar for awhile. But for various reasons, when I was ready to purchase, I didn’t; either the waitlist was long, or they didn’t have the specs I wanted.

Lately my aging laptop with 8GB RAM started OOMing (running out of RAM). My desktop had developed a tendency to hard hang about once a month, and I researched replacing it, but the cost was too high to justify.

But when I looked into the Framework, I thought: this thing could replace both. It is a real shift in perspective to have a laptop that is nearly as upgradable as a desktop, and can be specced out to exactly what I wanted: 2TB storage and 64GB RAM. And still cheaper than a Macbook or Thinkpad with far lower specs, because the Framework uses off-the-shelf components as much as possible.

Cory Doctorow wrote, in The Framework is the most exciting laptop I’ve ever broken:

The Framework works beautifully, but it fails even better… Framework has designed a small, powerful, lightweight machine – it works well. But they’ve also designed a computer that, when you drop it, you can fix yourself. That attention to graceful failure saved my ass.

I like small laptops, so I ordered the Framework 13. I loaded it up with the 64GB RAM and 2TB SSD I wanted. Frameworks have four configurable ports, which are also hot-swappable. I ordered two USB-C, one USB-A, and one HDMI. I put them in my preferred spots (one USB-C on each side for easy docking and charging). I put Debian on it, and it all Just Worked. Perfectly.

Now, I orderd the DIY version. I hesitated about this — I HATE working with laptops because they’re all so hard, even though I KNEW this one was different — but went for it, because my preferred specs weren’t available in a pre-assembled model.

I’m glad I did that, because assembly was actually FUN.

I got my box. I opened it. There was the bottom shell with the motherboard and CPU installed. Here are the RAM sticks. There’s the SSD. A minute or two with each has them installed. Put the bezel on the screen, attach the keyboard — it has magnets to guide it into place — and boom, ready to go. Less than 30 minutes to assemble a laptop nearly from scratch. It was easier than assembling most desktops.

So now, for the first time, my main computing device is a laptop. Rather than having a desktop and a laptop, I just have a laptop. I’ll be able to upgrade parts of it later if I want to. I can rearrange the ports. And I can take all my most important files with me. I’m quite pleased!

Connecting A Physical DEC vt420 to Linux

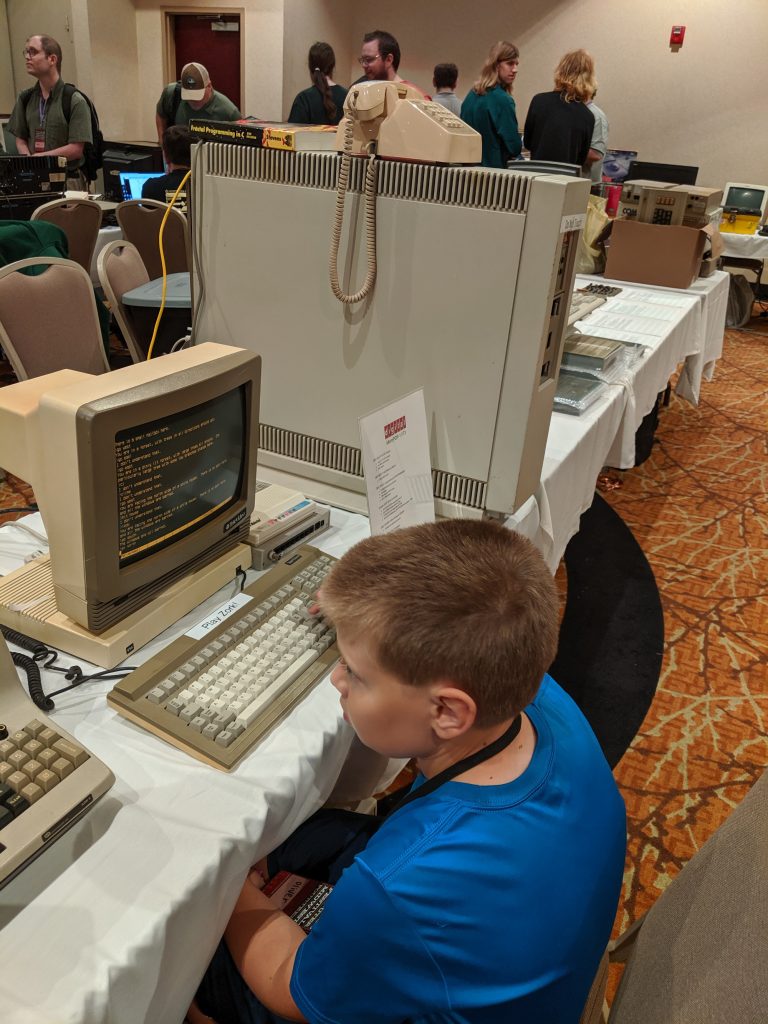
John and Oliver trip to Vintage Computer Festival Midwest 2019. Oliver playing Zork on the Micro PDP-11

Inspired by a weekend visit to Vintage Computer Festival Midwest at which my son got to play Zork on an amber console hooked up to a MicroPDP-11 running 2BSD, I decided it was time to act on my long-held plan to get a real old serial console hooked up to Linux.

Not being satisfied with just doing it for the kicks, I wanted to make it actually usable. 30-year-old DEC hardware meets Raspberry Pi. I thought this would be pretty easy, but it turns out is was a lot more complicated than I realized, involving everything from nonstandard serial connectors to long-standing kernel bugs!

Selecting a Terminal — And Finding Parts

I wanted something in amber for that old-school feel. Sadly I didn’t have the forethought to save any back in the 90s when they were all being thrown out, because now they’re rare and can be expensive. Search eBay and pretty soon you find a scattering of DEC terminals, the odd Bull or Honeywell, some Sperrys, and assorted oddballs that don’t speak any kind of standard protocol. I figured, might as well get a vt, since we’re still all emulating them now, 40+ years later. Plus, my old boss from my university days always had stories about DEC. I wish he were still around to see this.

I selected the vt420 because I was able to find them, and it has several options for font size, letting more than 24 lines fit on a screen.

Now comes the challenge: most of the vt420s never had a DB25 RS-232 port. The VT420-J, an apparently-rare international model, did, but it is exceptionally rare. The rest use a DEC-specific port called the MMJ. Thankfully, it is electrically compatible with RS-232, and I managed to find the DEC H8571-J adapter as well as a BC16E MMJ cable that I need.

I also found a vt510 (with “paperwhite” instead of amber) in unknown condition. I purchased it, and thankfully it is also working. The vt510 is an interesting device; for that model, they switched to using a PS/2 keyboard connector, and it can accept either a DEC VT keyboard or a PC keyboard. It also supports full key remapping, so Control can be left of A as nature intended. However, there’s something about amber that is just so amazing to use again.

Preparing the Linux System

I thought I would use a Raspberry Pi as a gateway for this. With built-in wifi, that would let me ssh to other machines in my house without needing to plug in a serial cable – I could put the terminal wherever. Alternatively, I can plug in a USB-to-serial adapter to my laptop and just plug the terminal into it when I want. I wound up with a Raspberry Pi 4 kit that included some heatsinks.

I had two USB-to-serial adapters laying around: a Keyspan USA-19HS and a Digi I/O Edgeport/1. I started with the Keyspan on a Raspberry Pi 4 on the grounds that I didn’t have the needed Edgeport/1 firmware file laying about already. The Raspberry Pi does have serial capability integrated, but it doesn’t use RS-232 voltages and there have been reports of it dropping characters sometimes, so I figured the easy path would be a USB adapter. That turned out to be only partially right.

Serial Terminals with systemd

I have never set up a serial getty with systemd — it has, in fact, been quite a long while since I’ve done anything involving serial other than the occasional serial console (which is a bit different purpose).

It would have taken a LONG time to figure this out, but thanks to an article about the topic, it was actually pretty easy in the end. I didn’t set it up as a serial console, but spawning a serial getty did the trick. I wound up modifying the command like this:

ExecStart=-/sbin/agetty -8 -o '-p -- \\u' %I 19200 vt420

The vt420 supports speeds up to 38400 and the vt510 supports up to 115200bps. However, neither can process plain text at faster than 19200 so there is no point to higher speeds. And, as you are about to see, they can’t necessarily even muster 19200 all the time.

Flow Control: Oh My

The unfortunate reality with these old terminals is that the processor in them isn’t actually able to keep up with line speeds. Any speed above 4800bps can exceed processor capabilities when “expensive” escape sequences are sent. That means that proper flow control is a must. Unfortunately, the vt420 doesn’t support any form of hardware flow control. XON/XOFF is all it’ll do. Yeah, that stinks.

So I hooked the thing up to my desktop PC with a null-modem cable, and started to tinker. I should be able to send a Ctrl-S down the line and the output from the pi should immediately stop. It didn’t. Huh. I verified it was indeed seeing the Ctrl-S (open emacs, send Ctrl-S, and it goes into search mode). So something, somehow, was interfering.

After a considerable amount of head scratching, I finally busted out the kernel source. I discovered that the XON/XOFF support is part of the serial driver in Linux, and that — ugh — the keyspan serial driver never actually got around to implementing it. Oops. That’s a wee bit of a bug. I plugged in the Edgeport/1 instead of the Keyspan and magically XON/XOFF started working.

Well, for a bit.

You see, flow control is a property of the terminal that can be altered by programs on a running system. It turns out that a lot of programs have opinions about it, and those opinions generally run along the lines of “nobody could possibly be using XON/XOFF, so I’m going to turn it off.” Emacs is an offender here, but it can be configured. Unfortunately, the most nasty offender here is ssh, which contains this code that is ALWAYS run when using a pty to connect to a remote system (which is for every interactive session):

tio.c_iflag &= ~(ISTRIP | INLCR | IGNCR | ICRNL | IXON | IXANY | IXOFF);

Yes, so when you use ssh, your local terminal no longer does flow control. If you are particularly lucky, the remote end may recognize your XON/XOFF characters and process them. Unfortunately, the added latency and buffering in going through ssh and the network is likely to cause bursts of text to exceed the vt420’s measly 100-ish-byte buffer. You just can’t let the remote end handle flow control with ssh. I managed to solve this via GNU Screen; more on that later.

The vt510 supports hardware flow control! Unfortunately, it doesn’t use CTS/RTS pins, but rather DTR/DSR. This was a reasonably common method in the day, but appears to be totally unsupported in Linux. Bother. I see some mentions that FreeBSD supports DTR/DSR flow (dtrflow and dsrflow in stty outputs). It definitely looks like the Linux kernel has never plumbed out the reaches of RS-232 very well. It should be possible to build a cable to swap DTR/DSR over to CTS/RTS, but since the vt420 doesn’t support any of this anyhow, I haven’t bothered.

Character Sets

Back when the vt420 was made, it was pretty hot stuff that it was one of the first systems to support the new ISO-8859-1 standard. DEC was rather proud of this. It goes without saying that the terminal knows nothing of UTF-8.

Nowadays, of course, we live in a Unicode world. A lot of software crashes on ISO-8859-1 input (I’m looking at you, Python 3). Although I have old files from old systems that have ISO-8859-1 encoding, they are few and far between, and UTF-8 rules the roost now.

I can, of course, just set LANG=en_US and that will do — well, something. man, for instance, renders using ISO-8859-1 characters. But that setting doesn’t imply that any layer of the tty system actually converts output from UTF-8 to ISO-8859-1. For instance, if I have a file with a German character in it and use ls, nothing is going to convert it from UTF-8 to ISO-8859-1.

GNU Screen also, as it happens, mostly solves this.

GNU Screen to the rescue, somewhat

It turns out that GNU Screen has features that can address both of these issues. Here’s how I used it.

First, in my .bashrc, I set this:


if [ `tty` = "/dev/ttyUSB0" ]; then
stty -iutf8
export LANG=en_US
export MANOPT="-E ascii"
fi

Then, in my .screenrc, I put this:


defflow on
defencoding UTF-8

This tells screen that the default flow control mode is on, and that the default encoding for the pty that screen creates is UTF-8. It determines the encoding for the physical terminal for the environment, and correctly figures it to be ISO-8859-1. It then maps between the two! Yes!

My little ssh connecting script then does just this:

exec screen ssh "$@"

Which nicely takes care of the flow control issue and (most of) the encoding issue. I say “most” because now things like man will try to render with fancy em-dashes and the like, which have no representation in iso8859-1, so they come out as question marks. (Setting MANOPT=”-E ascii” fixes this) But no matter, it works to ssh to my workstation and read my email! (mu4e in emacs)

What screen doesn’t help with are things that have no ISO-8859-1 versions; em-dashes are the most frequent problems, and are replaced with unsightly question marks.

termcaps, terminfos, and weird things

So pretty soon you start diving down the terminal rabbit hole, and you realize there’s a lot of weird stuff out there. For instance, one solution to the problem of slow processors in terminals was padding: ncurses would know how long it would take the terminal to execute some commands, and would send it NULLs for that amount of time. That calculation, of course, requires knowledge of line speed, which one wouldn’t have in this era of ssh. Thankfully the vt420 doesn’t fall into that category.

But it does have a ton of modes. The Emacs On Terminal page discusses some of the interesting bits: 7-bit or 8-bit control characters, no ESC key, Alt key not working, etc, etc. I believe some of these are addressed by the vt510 (at least in PC mode). I wonder whether Emacs or vim keybindings would be best here…

Helpful Resources

Two Boys, An Airplane, Plus Hundreds of Old Computers

“Was there anything you didn’t like about our trip?”

Jacob’s answer: “That we had to leave so soon!”

That’s always a good sign.

When I first heard about the Vintage Computer Festival Midwest, I almost immediately got the notion that I wanted to go. Besides the TRS-80 CoCo II up in my attic, I also have fond memories of an old IBM PC with CGA monitor, a 25MHz 486, an Alpha also in my attic, and a lot of other computers along the way. I didn’t really think my boys would be interested.

But I mentioned it to them, and they just lit up. They remembered the Youtube videos I’d shown them of old line printers and punch card readers, and thought it would be great fun. I thought it could be a great educational experience for them too — and it was.

It also turned into a trip that combined being a proud dad with so many of my other interests. Quite a fun time.

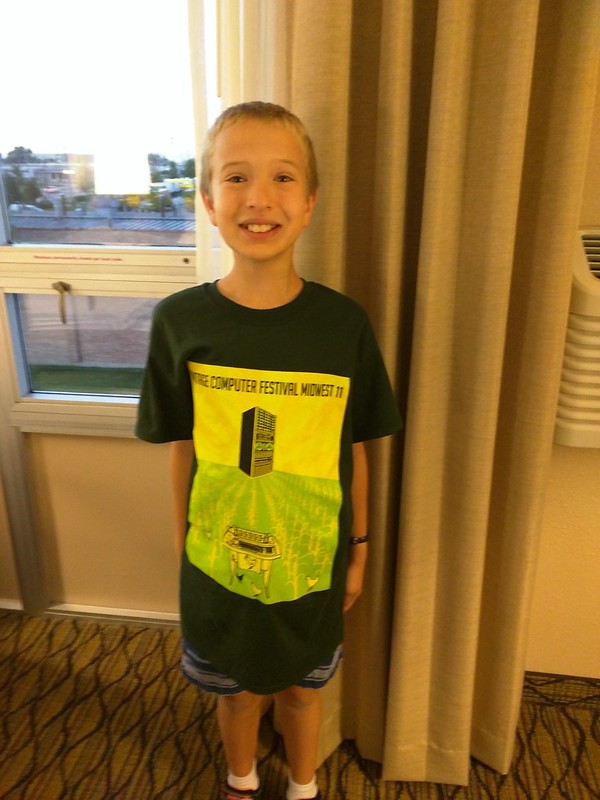
IMG_20160911_061456

(Jacob modeling his new t-shirt)

Captain Jacob

Chicago being not all that close to Kansas, I planned to fly us there. If you’re flying yourself, solid flight planning is always important. I had already planned out my flight using electronic tools, but I always carry paper maps with me in the cockpit for backup. I got them out and the boys and I planned out the flight the old-fashioned way.

Here’s Oliver using a scale ruler (with markings for miles corresponding to the scale of the map) and Jacob doing calculating for us. We measured the entire route and came to within one mile of the computer’s calculation for each segment — those boys are precise!

20160904_175519

We figured out how much fuel we’d use, where we’d make fuel stops, etc.

The day of our flight, we made it as far as Davenport, Iowa when a chance of bad weather en route to Chicago convinced me to land there and drive the rest of the way. The boys saw that as part of the exciting adventure!

Jacob is always interested in maps, and had kept wanting to use my map whenever we flew. So I dug an old Android tablet out of the attic, put Avare on it (which has aviation maps), and let him use that. He was always checking it while flying, sometimes saying this over his headset: “DING. Attention all passengers, this is Captain Jacob speaking. We are now 45 miles from St. Joseph. Our altitude is 6514 feet. Our speed is 115 knots. We will be on the ground shortly. Thank you. DING”

Here he is at the Davenport airport, still busy looking at his maps:

IMG_20160909_183813

Every little airport we stopped at featured adults smiling at the boys. People enjoyed watching a dad and his kids flying somewhere together.

Oliver kept busy too. He loves to help me on my pre-flight inspections. He will report every little thing to me – a scratch, a fleck of paint missing on a wheel cover, etc. He takes it seriously. Both boys love to help get the plane ready or put it away.

The Computers

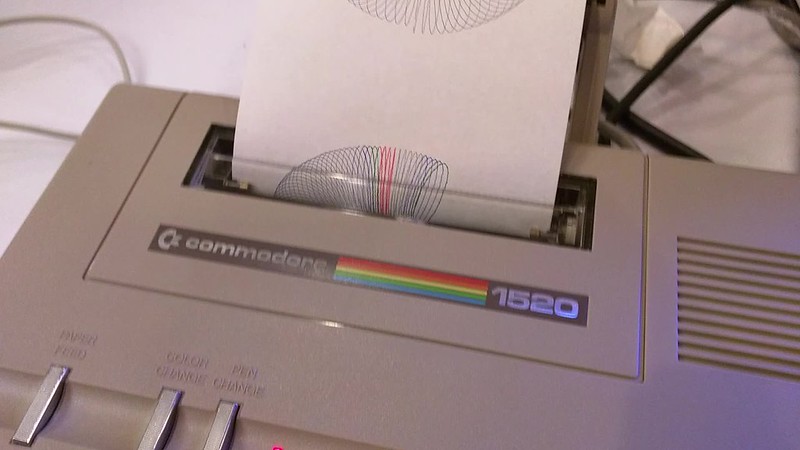
Jacob quickly gravitated towards a few interesting things. He sat for about half an hour watching this old Commodore plotter do its thing (click for video):

VID_20160910_142044

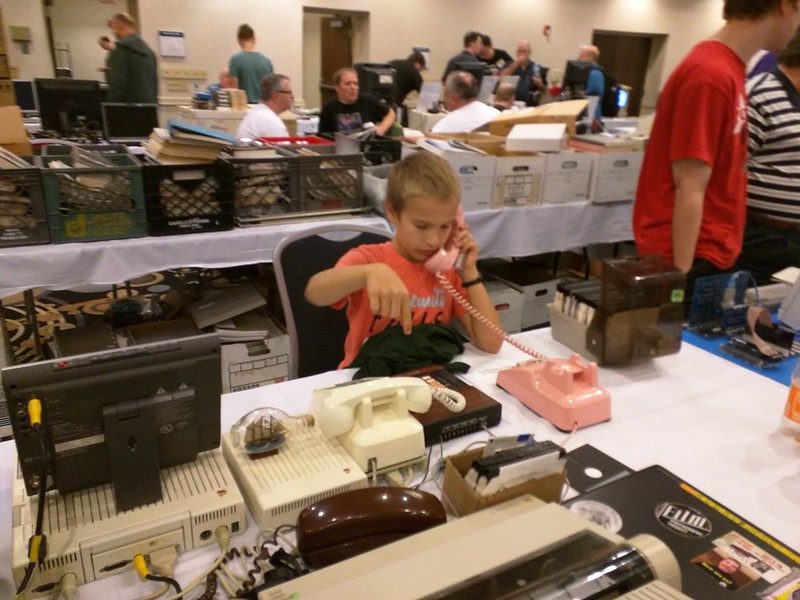
His other favorite thing was the phones. Several people had brought complete analog PBXs with them. They used them to demonstrate various old phone-related hardware; one had several BBSs running with actual modems, another had old answering machines and home-security devices. Jacob learned a lot about phones, including how to operate a rotary-dial phone, which he’d never used before!

IMG_20160910_151431

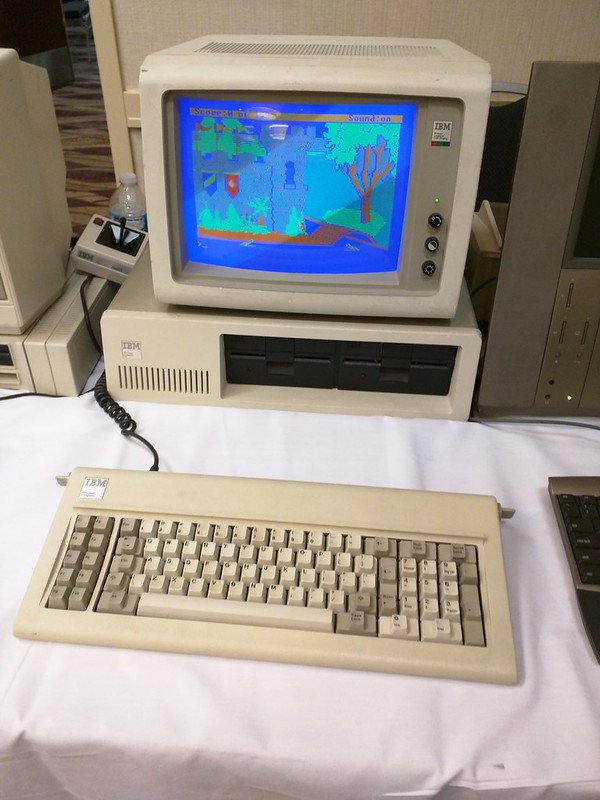
Oliver was drawn more to the old computers. He was fascinated by the IBM PC XT, which I explained was just about like a model I used to get to use sometimes. They learned about floppy disks and how computers store information.

IMG_20160910_195145

He hadn’t used joysticks much, and found Pong (“this is a soccer game!”) interesting. Somebody has also replaced the guts of a TRS-80 with a Raspberry Pi running a SNES emulator. This had thoroughly confused me for a little while, and excited Oliver.

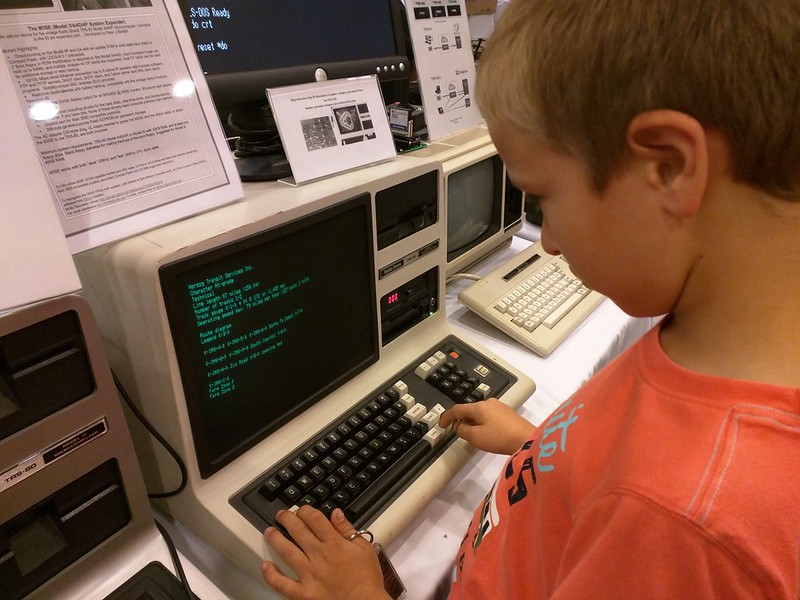
Jacob enjoyed an old TRS-80, which, through a modern Ethernet interface and a little computation help in AWS, provided an interface to Wikipedia. Jacob figured out the text-mode interface quickly. Here he is reading up on trains.

IMG_20160910_140524

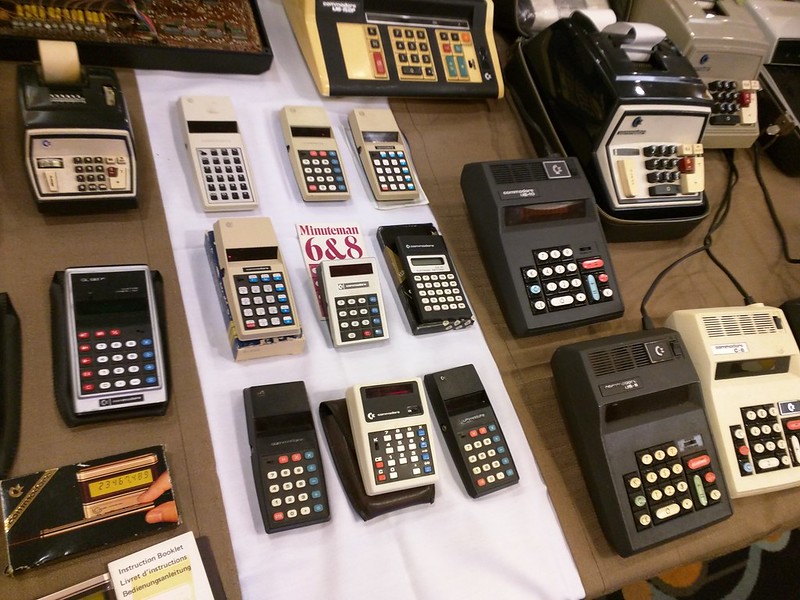
I had no idea that Commodore made a lot of adding machines and calculators before they got into the home computer business. There was a vast table with that older Commodore hardware, too much to get on a single photo. But some of the adding machines had their covers off, so the boys got to see all the little gears and wheels and learn how an adding machine can do its printing.

IMG_20160910_145911

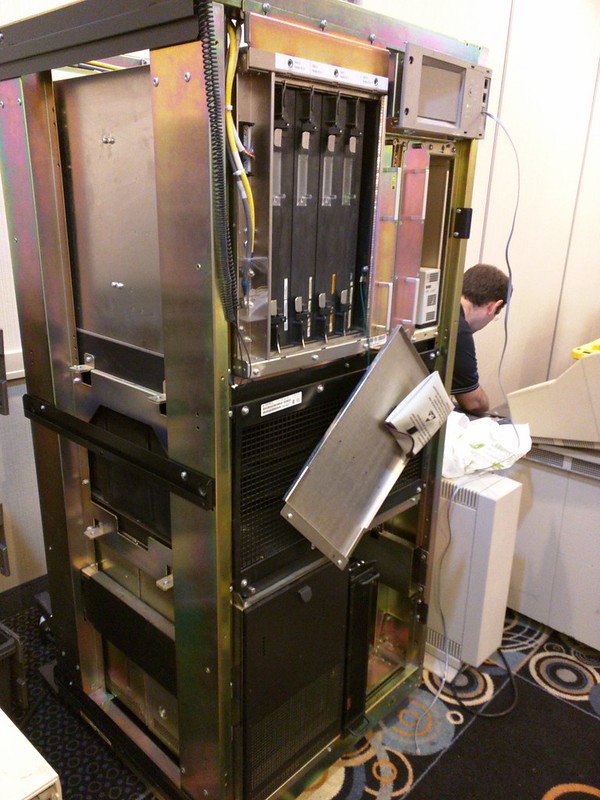
And then we get to my favorite: the big iron. Here is a VAX — a working VAX. When you have a computer that huge, it’s easier for the kids to understand just what something is.

IMG_20160910_125451

When we encountered the table from the Glenside Color Computer Club, featuring the good old CoCo IIs like what I used as a kid (and have up in my attic), I pointed out to the boys that “we have a computer just like this that can do these things” — and they responded “wow!” I think they are eager to try out floppy disks and disk BASIC now.

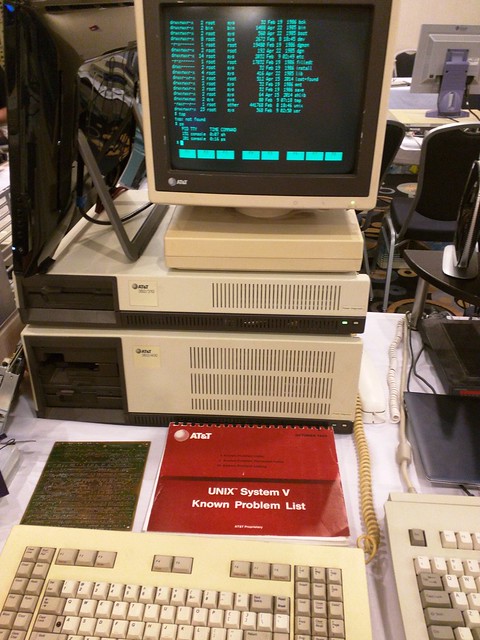
Some of my favorites were the old Unix systems, which are a direct ancestor to what I’ve been working with for decades now. Here’s AT&T System V release 3 running on its original hardware:

IMG_20160910_144923

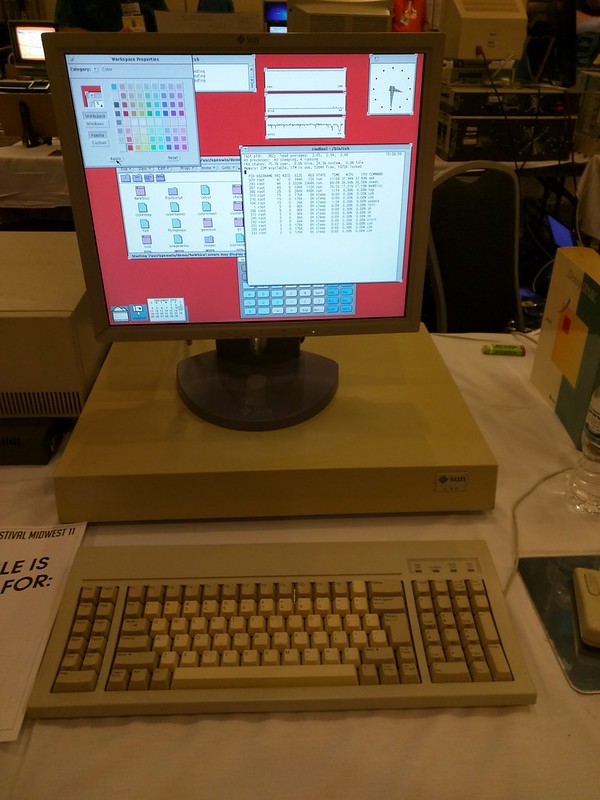
And there were a couple of Sun workstations there, making me nostalgic for my college days. If memory serves, this one is actually running on m68k in the pre-Sparc days:

IMG_20160910_153418

Returning home

After all the excitement of the weekend, both boys zonked out for awhile on the flight back home. Here’s Jacob, sleeping with his maps still up.

IMG_20160911_132952

As we were nearly home, we hit a pocket of turbulence, the kind that feels as if the plane is dropping a bit (it’s perfectly normal and safe; you’ve probably felt that on commercial flights too). I was a bit concerned about Oliver; he is known to get motion sick in cars (and even planes sometimes). But what did I hear from Oliver?

“Whee! That was fun! It felt like a roller coaster! Do it again, dad!”

Mud, Airplanes, Arduino, and Fun

The last few weeks have been pretty hectic in their way, but I’ve also had the chance to take some time off work to spend with family, which has been nice.

Memorial Day: breakfast and mud

For Memorial Day, I decided it would be nice to have a cookout for breakfast rather than for dinner. So we all went out to the fire ring. Jacob and Oliver helped gather kindling for the fire, while Laura chopped up some vegetables. Once we got a good fire going, I cooked some scrambled eggs in a cast iron skillet, mixed with meat and veggies. Mmm, that was tasty.

Then we all just lingered outside. Jacob and Oliver enjoyed playing with the cats, and the swingset, and then…. water. They put the hose over the slide and made a “water slide” (more mud slide maybe).

IMG_7688

Then we got out the water balloon fillers they had gotten recently, and they loved filling up water balloons. All in all, we all just enjoyed the outdoors for hours.

MVI_7738

Flying to Petit Jean, Arkansas

Somehow, neither Laura nor I have ever really been to Arkansas. We figured it was about time. I had heard wonderful things about Petit Jean State Park from other pilots: it’s rather unique in that it has a small airport right in the park, a feature left over from when Winthrop Rockefeller owned much of the mountain.

And what a beautiful place it was! Dense forests with wonderful hiking trails, dotted with small streams, bubbling springs, and waterfalls all over; a nice lake, and a beautiful lodge to boot. Here was our view down into the valley at breakfast in the lodge one morning:

IMG_7475

And here’s a view of one of the trails:

IMG_7576

The sunset views were pretty nice, too:

IMG_7610

And finally, the plane we flew out in, parked all by itself on the ramp:

IMG_20160522_171823

It was truly a relaxing, peaceful, re-invigorating place.

Flying to Atchison

Last weekend, Laura and I decided to fly to Atchison, KS. Atchison is one of the oldest cities in Kansas, and has quite a bit of history to show off. It was fun landing at the Amelia Earhart Memorial Airport in a little Cessna, and then going to three museums and finding lunch too.

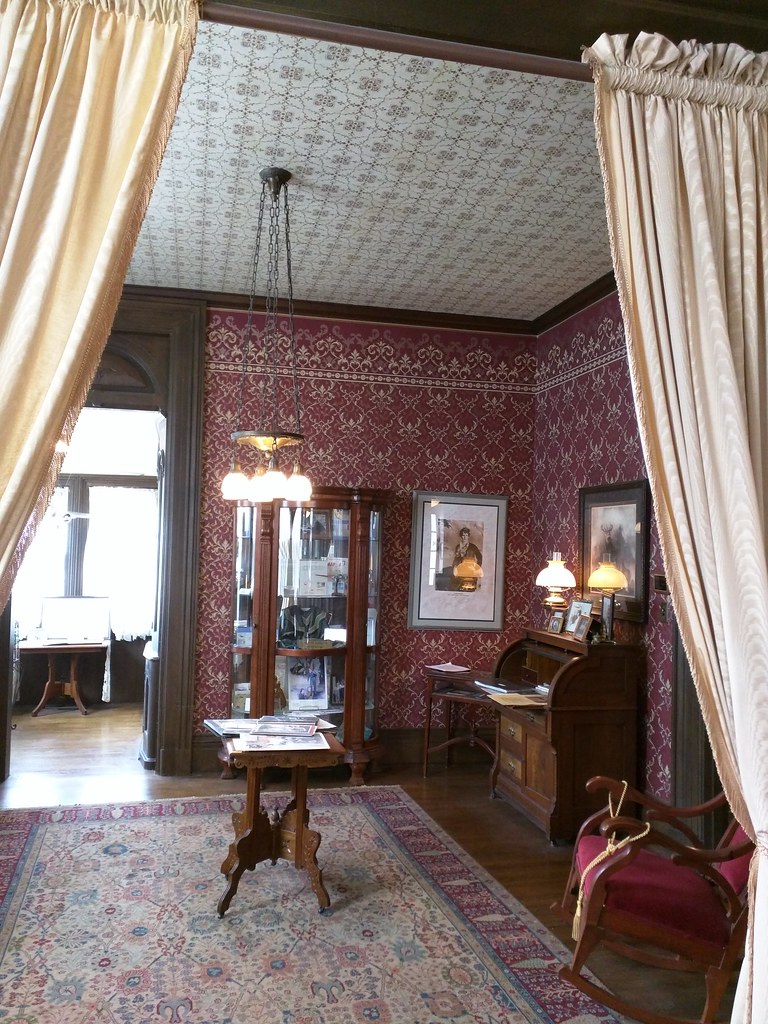
Of course, there is the Amelia Earhart Birthplace Museum, which is a beautifully-maintained old house along the banks of the Missouri River.

IMG_20160611_134313

I was amused to find this hanging in the county historical society museum:

IMG_20160611_153826

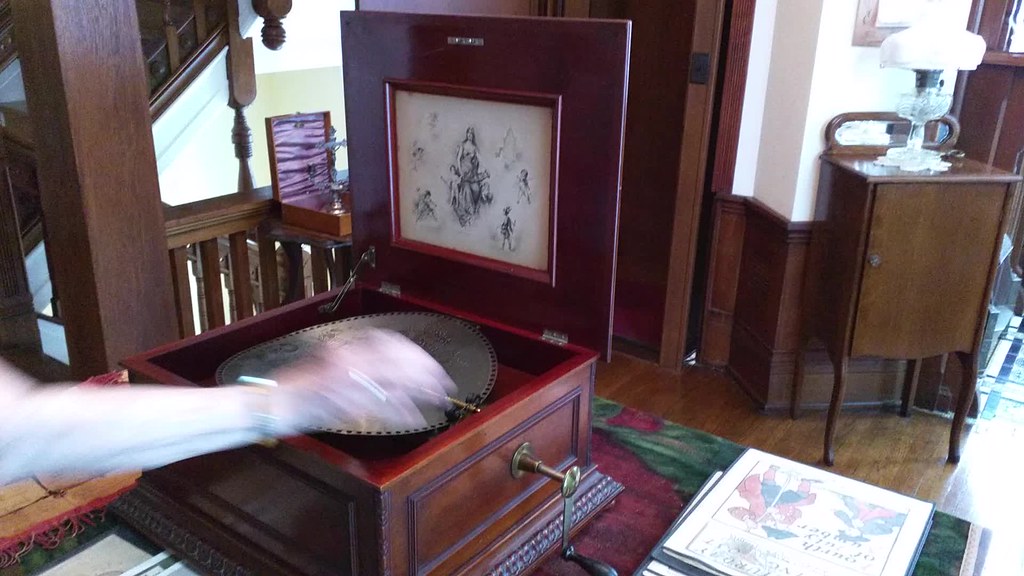
One fascinating find is a Regina Music Box, popular in the late 1800s and early 1900s. It operates under the same principles as those that you might see that are cylindrical. But I am particular impressed with the effort that would go into developing these discs in the pre-computer era, as of course the holes at the outer edge of the disc move faster than the inner ones. It would certainly take a lot of careful calculation to produce one of these. I found this one in the Cray House Museum:

VID_20160611_151504

An Arduino Project with Jacob

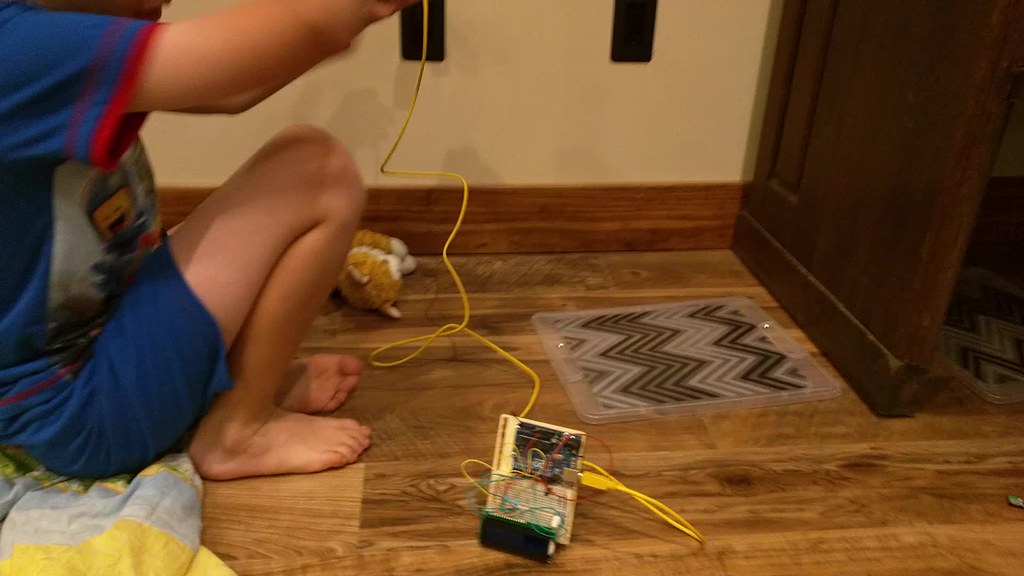
One day, Jacob and I got going with an Arduino project. He wanted flashing blue lights for his “police station”, so we disassembled our previous Arduino project, put a few things on the breadboard, I wrote some code, and there we go. Then he noticed an LCD in my Arduino kit. I hadn’t ever gotten around to using it yet, and of course he wanted it immediately. So I looked up how to connect it, found an API reference, and dusted off my C skills (that was fun!) to program a scrolling message on it. Here is Jacob showing it off:

VID_20160614_074802.mp4

Bach, Dot Matrix Printers, and Dinner

Dinner last night started out all normal. Then Jacob and Oliver started asking me about printers. First they wanted to know how an ink jet printer works. Then they wanted to know how a laser printer works. Then they wanted to know what would happen if you’d put ink in a laser printer or toner in an ink jet. They were fascinated as I described the various kinds of clogging and ruining that would inevitably occur.

Then these words: “What other kinds of printers are there?”

So our dinner conversation started to resolve around printers. I talked about daisy wheel printers, line printers, dot matrix printers. I explained the type chain of line printers, the pins of dot matrix. “More printers!” I had to dig deeper into my memory: wax transfer printers, thermal printers, dye sublimation, always describing a bit about how each one worked — except for dye sublimation, which I couldn’t remember many details about. “More printers!” So we went onwards towards the printing press, offset printing, screen printing, mimeograph, and photocopiers. Although I could give them plenty of details about most of the printers, I also failed under their barrage of questions about offset printing. So I finally capitulated, and said “should I go get my phone and look it up while you finish eating?” “YEAH!”

So I looked up the misty details of dye sublimation and offset printing and described how they worked. That seemed to satisfy them. Then they asked me what my favorite kind of printer was. I said “dot matrix, because it makes the best sound.” That had their attention. They stopped eating to ask the vitally important question: “Dad, what sound does it make?” At this point, I did my best dot matrix impression at the dinner table, to much laughter and delight.

Before long, they wanted to see videos of dot matrix printers. They were fascinated by them. And then I found this gem of a dot matrix printer playing a famous Bach tune, which fascinated me also:

I guess it must have all sunk in, because this morning before school Jacob all of a sudden begged to see the fuser in my laser printer. So we turned it around, opened up the back panel — to his obvious excitement — and then I pointed to the fuser, with its “hot” label. I even heard a breathy “wow” from him.

Detailed Smart Card Cryptographic Token Security Guide

After my first post about smartcards under Linux, I thought I would share some information I’ve been gathering.

This post is already huge, so I am not going to dive into — much — specific commands, but I am linking to many sources with detailed instructions.

I’ve reviewed several types of cards. For this review, I will focus on the OpenPGP card and the Yubikey NEO, since the Cardomatic Smartcard-HSM is not supported by the gpg version in Jessie.

Both cards are produced by people with strong support for the Free Software ecosystem and have strong cross-platform support with source code.

OpenPGP card: Basics with GnuPG

The OpenPGP card is well-known as one of the first smart cards to work well on Linux. It is a single-application card focused on use with GPG. Generally speaking, by the way, you want GPG2 for use with smartcards.

Basically, this card contains three slots: decryption, signing, and authentication slots. The concept is that the private key portions of the keys used for these items are stored only on the card, can never be extracted from the card, and the cryptographic operations are performed on the card. There is more information in my original post. In a fairly rare move for smartcards, this card supports 4096-byte RSA keys; most are restricted to 2048-byte keys.

The FSF Europe hands these out to people and has a lot of good information about them online, including some HOWTOs. The official GnuPG smart card howto is 10 years old, and although it has some good background, I’d suggest using the FSFE instructions instead.

As you’ll see in a bit, most of this information also pertains to the OpenPGP mode of the Yubikey Neo.

OpenPGP card: Other uses

Of course, this is already pretty great to enhance your GPG security, but there’s a lot more that you can do with this card to add two-factor authentication (2FA) to a lot of other areas. Here are some pointers:

OpenPGP card: remote authentication with ssh

You can store the private part of your ssh key on the card. Traditionally, this was only done by using the ssh agent emulation mode of gnupg-agent. This is still possible, of course.

Now, however, the OpenSC project now supports the OpenPGP card as a PKCS#11 and PKCS#15 card, which means it works natively with ssh-agent as well. Try just ssh-add -s /usr/lib/x86_64-linux-gnu/pkcs11/opensc-pkcs11.so if you’ve put a key in the auth slot with GPG. ssh-add -L will list its fingerprint for insertion into authorized_keys. Very simple!

As an aside: Comments that you need scute for PKCS#11 support are now outdated. I do not recommend scute. It is quite buggy.

OpenPGP card: local authentication with PAM

You can authenticate logins to a local machine by using the card with libpam-poldi — here are some instructions.

Between the use with ssh and the use with PAM, we have now covered 2FA for both local and remote use in Unix environments.

OpenPGP card: use on Windows

Let’s move on to Windows environments. The standard suggestion here seems to be the mysmartlogon OpenPGP mini-driver. It works with some sort of Windows CA system, or the local accounts using EIDAuthenticate. I have not yet tried this.

OpenPGP card: Use with X.509 or Windows Active Directory

You can use the card in X.509 mode via these gpgsm instructions, which apparently also work with Windows Active Directory in some fashion.

You can also use it with web browsers to present a certificate from a client for client authentication. For example, here are OpenSC instructions for Firefox.

OpenPGP card: Use with OpenVPN

Via the PKCS#11 mode, this card should be usable to authenticate a client to OpenVPN. See the official OpenVPN HOWTO or these other instructions for more.

OpenPGP card: a note on PKCS#11 and PKCS#15 support

You’ll want to install the opensc-pkcs11 package, and then give the path /usr/lib/x86_64-linux-gnu/pkcs11/opensc-pkcs11.so whenever something needs the PKCS#11 library. There seem to be some locking/contention issues between GPG2 and OpenSC, however. Usually killing pcscd and scdaemon will resolve this.

I would recommend doing manipulation operations (setting PINs, generating or uploading keys, etc.) via GPG2 only. Use the PKCS#11 tools only to access.

OpenPGP card: further reading

Kernel Concepts also has some nice readers; you can get this card in a small USB form-factor by getting the mini-card and the Gemalto reader.

Yubikey Neo Introduction

The Yubikey Neo is a fascinating device. It is a small USB and NFC device, a little smaller than your average USB drive. It is a multi-application device that actually has six distinct modes:

  • OpenPGP JavaCard Applet (pc/sc-compatible)
  • Personal Identity Verification [PIV] (pc/sc-compatible, PKCS#11-compatible in Windows and OpenSC)
  • Yubico HOTP, via your own auth server or Yubico’s
  • OATH, with its two sub-modes:
    • OATH TOTP, with a mobile or desktop helper app (drop-in for Google Authenticator
    • OATH HOTP
  • Challenge-response mode
  • U2F (Universal 2nd Factor) with Chrome

There is a ton to digest with this device.

Yubikey Neo Basics

By default, the Yubikey Neo is locked to only a subset of its features. Using the yubikey-personalization tool (you’ll need the version in stretch; jessie is too old), you can use ykpersonalize -m86 to unlock the full possibilities of the card. Run that command, then unplug and replug the device.

It will present itself as a USB keyboard as well as a PC/SC-compatible card reader. It has a capacitive button, which is used to have it generate keystrokes to input validation information for HOTP or HMAC validation. It has two “slots” that can be configured with HMAC and HOTP; a short button press selects the default slot and a long press selects slot .

But before we get into that, let’s step back at some basics.

opensc-tool –list-algorithms claims this card supports RSA with 1024, 2048, and 3072 sizes, and EC with 256 and 384-bit sizes. I haven’t personally verified anything other than RSA-2048 though.

Yubikey Neo: OpenPGP support

In this mode, the card is mostly compatible with the physical OpenPGP card. I say “mostly” because there are a few protocol differences I’ll get into later. It is also limited to 2048-byte keys.

Support for this is built into GnuPG and the GnuPG features described above all work fine.

In this mode, it uses firmware from the Yubico fork of the JavaCard OpenPGP Card applet. There are Yubico-specific tutorials available, but again, most of the general GPG stuff applies.

You can use gnupg-agent to use the card with SSH as before. However, due to some incompatibilities, the OpenPGP applet on this card cannot be used as a PKCS#11 card with either scute or OpenSC. That is not exactly a huge problem, however, as the card has another applet (PIV) that is compatible with OpenSC and so this still provides an avenue for SSH, OpenVPN, Mozilla, etc.

It should be noted that the OpenPGP applet on this card can also be used with NFC on Android with the OpenKeychain app. Together with pass (or its Windows, Mac, or phone ports), this makes a nicely secure system for storing passwords.

Yubikey Neo: PKCS#11 with the PIV applet

There is also support for the PIV standard on the Yubikey Neo. This is supported by default on Linux (via OpenSC) and Windows and provides a PKCS#11-compabible store. It should, therefore, be compatible with ssh-agent, OpenVPN, Active Directory, and all the other OpenPGP card features described above. The only difference is that it uses storage separate from the OpenPGP applet.

You will need one of the Yubico PIV tools to configure the key for it; in Debian, the yubico-piv-tool from stretch does this.

Here are some instructions on using the Yubikey Neo in PIV mode:

A final note: for security, it’s important to change the management key and PINs before deploying the PIV mode.

I couldn’t get this to work with Firefox, but it worked pretty much everywhere else.

Yubikey Neo: HOTP authentication

This is the default mode for your Yubikey; all other modes require enabling with ykpersonalize. In this mode, a 128-bit AES key stored on the Yubikey is used to generate one-time passwords (OTP). (This key was shared in advance with the authentication server.) A typical pattern would be for three prompts: username, password, and Yubikey HOTP. The user clicks in the Yubikey HOTP field, touches the Yubikey, and their one-time token is pasted in.

In the background, the service being authenticated to contacts an authentication server. This authentication server can be either your own (there are several open source implementations in Debian) or the free Yubicloud.

Either way, the server decrypts the encrypted part of the OTP, performs validity checks (making sure that the counter is larger than any counter it’s seen before, etc) and returns success or failure back to the service demanding authentication.

The first few characters of the posted auth contain the unencrypted key ID, and thus it can also be used to provide username if desired.

Yubico has provided quite a few integrations and libraries for this mode. A few highlights:

You can also find some details on the OTP mode. Here’s another writeup.

This mode is simple to implement, but it has a few downsides. One is that it is specific to the Yubico line of products, and thus has a vendor lock-in factor. Another is the dependence on the authentication server; this creates a potential single point of failure and can be undesireable in some circumtances.

Yubikey Neo: OATH and HOTP and TOTP

First, a quick note: OATH and OAuth are not the same. OATH is an authentication protocol, and OAuth is an authorization protocol. Now then…

Like Yubikey HOTP, OATH (both HOTP and TOTP) modes rely on a pre-shared key. (See details in the Yubico article.) Let’s talk about TOTP first. With TOTP, there is a pre-shared secret with each service. Each time you authenticate to that service, your TOTP generator combines the timestamp with the shared secret using a HMAC algorithm and produces a OTP that changes every 30 seconds. Google Authenticator is a common example of this protocol, and this is a drop-in replacement for it. Gandi has a nice description of it that includes links to software-only solutions on various platforms as well.

With the Yubikey, the shared secrets are stored on the card and processed within it. You cannot extract the shared secret from the Yubikey. Of course, if someone obtains physical access to your Yubikey they could use the shared secret stored on it, but there is no way they can steal the shared secret via software, even by compromising your PC or phone.

Since the Yubikey does not have a built-in clock, TOTP operations cannot be completed solely on the card. You can use a PC-based app or the Android application (Play store link) with NFC to store secrets on the device and generate your TOTP codes. Command-line users can also use the yubikey-totp tool in the python-yubico package.

OATH can also use HOTP. With HOTP, an authentication counter is used instead of a clock. This means that HOTP passwords can be generated entirely within the Yubikey. You can use ykpersonalize to configure either slot 1 or 2 for this mode, but one downside is that it can really only be used with one service per slot.

OATH support is all over the place; for instance, there’s libpam-oath from the OATH toolkit for Linux platforms. (Some more instructions on this exist.)

Note: There is another tool from Yubico (not in Debian) that can apparently store multiple TOTP and HOTP codes in the Yubikey, although ykpersonalize and other documentation cannot. It is therefore unclear to me if multiple HOTP codes are supported, and how..

Yubikey Neo: Challenge-Response Mode

This can be useful for doing offline authentication, and is similar to OATH-HOTP in a sense. There is a shared secret to start with, and the service trying to authenticate sends a challenge to the token, which must supply an appropriate response. This makes it only suitable for local authentication, but means it can be done fairly automatically and optionally does not even require a button press.

To muddy the waters a bit, it supports both “Yubikey OTP” and HMAC-SHA1 challenge-response modes. I do not really know the difference. However, it is worth noting that libpam-yubico works with HMAC-SHA1 mode. This makes it suitable, for instance, for logon passwords.

Yubikey Neo: U2F

U2F is a new protocol for web-based apps. Yubico has some information, but since it is only supported in Chrome, it is not of interest to me right now.

Yubikey Neo: Further resources

Yubico has a lot of documentation, and in particular a technical manual that is actually fairly detailed.

Closing comments

Do not think a hardware security token is a panacea. It is best used as part of a multi-factor authentication system; you don’t want a lost token itself to lead to a breach, just as you don’t want a compromised password due to a keylogger to lead to a breach.

These things won’t prevent someone that has compromised your PC from abusing your existing ssh session (or even from establishing new ssh sessions from your PC, once you’ve unlocked the token with the passphrase). What it will do is prevent them from stealing your ssh private key and using it on a different PC. It won’t prevent someone from obtaining a copy of things you decrypt on a PC using the Yubikey, but it will prevent them from decrypting other things that used that private key. Hopefully that makes sense.

One also has to consider the security of the hardware. On that point, I am pretty well satisfied with the Yubikey; large parts of it are open source, and they have put a lot of effort into hardening the hardware. It seems pretty much impervious to non-government actors, which is about the best guarantee a person can get about anything these days.

I hope this guide has been helpful.
A Verbose, Hands-On Nexus 7 Review

Some of you may have noticed that I am not a concise author. Perhaps that has something to do with the fact that I am not a concise reader. I like facts, details, and lots of them. So as a recent Nexus 7 purchaser, here you go.

Genesis

I’ve long used Android devices, and last year had a company-issued Motorola Xoom, which was the first Google Experience tablet with Honeycomb. That tablet has specs roughly similar to iPads; its 10.1″ screen was the same, the 1280×800 screen was better than the iPad available at the time, and its 730g weight identical to the early iPads (though 10% higher than the current iPad). I lost access to it when I changed jobs, and had been without a tablet until recently.

Other devices I own are the Galaxy Nexus, sporting a 4.65″ screen; and what’s now called the Kindle Keyboard, with an eInk screen.

I had been somewhat interested in the Kindle Fire, but the closed nature and limited capability of the system kept me away.

The Nexus 7 reviews, however, were stunning, as was the price. $200 for a great tablet. I wound up buying the $250 16GB model. But not until after I spent a great deal of time thinking about size.

Physical Size

My main concern was that the Nexus 7 would be too small to be useful. I had never been particularly pleased with my input speed on the Xoom. I tried to touch type on it, but was just never fast enough to surpass “frustratingly slow.” I have long been a fast and accurate typist on keyboard; well over 100 words per minute, and it is frustrating when my fingers can’t maintain that speed.

I figured the situation would be even worse on the Nexus 7, given its smaller size.

I also found the Xoom to sometimes feel a little small with the 10″ screen, and was concerned about that as well.

And finally, 7″ doesn’t sound all that much larger than 4.65″.

However, having actually had the Nexus 7 for a little while now, I’m very pleased with the size, and may even prefer it. The 10″ tablets are just too big and heavy to comfortably hold in one hand, and I’ve realized that part of my Xoom frustration was the fact that I had to set it down and prop it up for anything beyond very brief use. At 340g, the Nexus 7 is less than half the weight of the Xoom or iPad, and it makes a huge difference. While still nowhere near where I’d be with a keyboard, two-thumb typing in portrait mode, or even something approaching touch typing in landscape mode, is possible on the Nexus 7.

The screen size hasn’t been a bother, at all. This may be due to the fact that it’s higher resolution (it’s 1280×800 like the Xoom, but those pixels are crammed into only 7″). I think it’s also partly due to the fact that the browser in Jelly Bean is significantly better than the one in Honeycomb, and perhaps that websites are better at tablet-friendliness, too.

Overall, the Nexus 7 feels a lot farther from the size of a laptop than did the Xoom, and as such is more prone to come with me in lots of situations, I think.

It works reasonably well with foldable Bluetooth keyboards, so when thinking about a laptop replacement or alternative, that might be the way I go. A Bluetooth mouse also works with it, though I found it didn’t provide near the utility that a BT keyboard does.

Display

The display is both amazing and disappointing. Browse some photos and some of them will show up in eye-popping clarity. Websites display fine. But the screen can also take on a washed-out appearance at times. I am notoriously picky in my displays, and this bothered me enough that I researched it. Analysis has shown that poor firmware calibration has lead to the compression of highlights, which mirrors what I was seeing. I am mostly used to it by now, but it’s a disappointment.

Most of the time, though, the screen is excellent. In comparison to my eInk Kindle, however, I don’t think any tablet will ever be as good for book reading. The eInk screen truly is easier on the eyes, and the reflection of overhead lights on the Nexus 7 display can be distracting at first.

I have had occasional issues with it not registering touches properly. This is always cleared up by touching the power button to put the unit to sleep, then waking it back up.

Other Hardware

There are three hardware buttons: power and volume up/down. Physically, the device fits my hand well, though I might wish it was a little lighter like my Kindle. Charging is accomplished via high-power 2A micro-USB, and there is, of course, a headphone port. There is no alert LED like my Galaxy Nexus has, and no vibration feature. The speaker is on the back, and the microphones along the left side – a position which, it appears, many Nexus 7 cases are blocking.

Battery Life

I am astonished at how good this device is battery-wise, especially compared to the battery disaster that is the Galaxy Nexus. Google claims the Nexus 7 can survive 8 hours of solid screen-on use, and I don’t doubt it. Mine’s never gotten low enough to get a solid measurement.

Wifi

The wifi works well, as far as it goes. The wifi doesn’t support 802.11n in 5GHz, which although somewhat common for devices like this, is a bit of a disappointment.

Software

The big story about the Nexus 7 is Jelly Bean. I had used Honeycomb on the Xoom, and Ice Cream Sandwich on my Galaxy Nexus, so I’m familiar with its predecessors. Let’s take a look.

Project Butter

Much has been made of Project Butter, Google’s attempt to optimize Android to improve its responsiveness and the smoothness of things like scrolling. I can say they have done quite well. This device is so smooth you don’t notice how smooth it is. It wasn’t until I had been using it for a bit that I really noticed. That’s a job well-done.

Chrome

The browser in Jelly Bean is now called Chrome. I am not sure if this is just marketing or not. It doesn’t really feel all that different from previous versions of the Android browser, and the changes have been along the lines of incremental changes Google has introduced before.

One of the very best new features happens when you touch a link that is close to other links on a page. Rather than getting a pretty much random page, Chrome pops up a partial-screen zoom box showing the part of the page near where your finger touched. With everything showing up huge, it is now easy to touch the precise link you want. Do so, and the box goes away, and your page loads. I am amazed at how much improvement this one change brings. Compared to ICS Browser, bookmarks can be brought up quicker, and the tab interface is nicer.

All is not perfect in the land of Chrome, however. It contains several regressions from the Ice Cream Sandwich browser.

I have two complaints about bookmarks. One is that previous versions of the browser would show thumbnails of sites in the bookmark viewer. This was a nice navigation aid. Chrome shows only favorites icons, if one is available, or a generic icon if not. Also, the bookmarks synced with other Android devices are called, confusingly enough, “Desktop Bookmarks” now, and require an extra tap to access.

I have had occasional trouble with Chrome not wanting to prompt for credentials for servers on my LAN that use HTTP auth.

Chrome has also removed the ICS browser’s ability to save a page, including all its elements, for offline viewing. Good for things like an airline checkin screen and such. I have no idea why Chrome removed this. I installed the Firefox Beta for Android, which also doesn’t have the offline save feature, but it does have a save to PDF feature.

Soft Keyboard

The on-screen soft keyboard in Jelly Bean is a significant regression from previous versions of Android. My biggest complaint is the lack of visual feedback for keypresses. On earlier versions of Android, when you push a key, you’ll see an image of it pop up on the screen, offset a little from the location of the key itself. In JB, all that happens is that the key itself changes colors. Not very helpful, because it is under your finger at the time. This small thing frustrates me to no end.

The keyboard in ICS introduced some nice features as well, mainly long-presses as shortcuts to other features. For instance, you can long-press a key on the top row of letters to get numerals without having to switch to the number mode. Similarly, long press the period and you get other common punctuation. The JB keyboard removed both of those features.

Thankfully, in the Market, there is an app called Ice Cream Sandwich Keyboard. It appears geared towards people running earlier versions of Android. Sadly, it is also a step up over what we have in JB.

Google Now and Voice Recognition

The other main headline feature in Jelly Bean is Google Now. The somewhat-competitor to Apple’s Siri, Google Now takes a bit of a different approach than Apple. It is said that Siri is better than Google Now at responding to queries, but Google Now is better at predicting what you want to know before you ever ask. I haven’t ever used Siri, but I would buy that explanation.

Google Now is available with a swipe up from the bottom of the screen, or with a single touch from any Home screen. Bring it up and it shows you current information about what it thinks you need to know. Examples include weather and forecast information, time to get to home or work from your current location, alerts that you need to leave soon to get to a certain place on time, flight schedules, sports scores, etc.

Google Now has been mostly a gimmick to me, but that may be because I fall outside its target demographic in significant ways. I live nowhere near a public transportation system, work at home for the most part, haven’t flown wince I’ve had the Nexus 7, don’t follow sports, and already know how long it takes to get places (and when it varies, it’s because of muddy roads or harvest — neither things that traffic services know about.)

The weather widget always seems to show the temperature from a couple of hours ago. It does show the weather in your current location. Well, mostly. I was in Newton, KS one day. I tapped on the icon for more detail. That simply took me to a Google search for “weather Newton”. Which showed me the weather for Newton, Massachusetts — 1600 miles away. Fail.

Speech recognition in JB is definitely improved. It is somewhat useful with Google Now. I like being able to simply say “set alarm for 30 minutes.” And it does it a lot quicker than I could in the interface. It’s supposed to be able to let me bring up my contacts in the same way, but it is much more likely to try turning such an attempt into a Google search than an actual display of a contact. It’s picky on the precise language used for setting an alarm too; say it slightly differently, and it’s another Google search.

JB also supports limited offline speech recognition. I say limited because it’s a bit strange. I have, for instance, a Remember the Milk widget on my home screen. It has a microphone icon to use to speak a new reminder. Tap it, and you can’t use it offline. It also has a button that brings up the on-screen keyboard. Do that, then touch the microphone on the keyboard, and you can use offline recognition. I have no idea how to explain this difference, since both are clearly using Google’s engine.

The speech recognition is indeed better, and might make it suitable for use instead of a keyboard for composing short texts and such. But it rarely produces even a sentence that I don’t have to correct in some way, even now.

Conclusion

Despite some of its shortcomings, I am very fond of the Nexus 7. It is an excellent device. And at $200-$250, it is an AMAZING device. I am truly impressed with it, and don’t regret my purchase at all.

A Linux-Based RFID Thing Finder

Sometimes I have things nicely organized. Power adapters for radios in one drawer, for cameras in the next. And sometimes… not so much. Sometimes I’m not sure if things are in the basement or the attic. It seems like technology should be able to help solve this problem, but as far as I can tell, no such solution exists yet.

So I’m planning to build one.

Here’s my general idea. Feedback, of course, is welcome.

Each item to be tracked can have an RFID tag of some sort attached to it. These tags can be read by an RFID reader at a distance of somewhere between 1ft and 1m in typical conditions. The reader could then act as a proximity alert to an object being searched for – a “you’re close” beep, for instance.

That helps, but is only part of the battle. It doesn’t help if you don’t even know which room to look in. So the second part of the plan is that the RFID reader is constantly talking to an object database. Besides the obvious association between RFID tag IDs and object descriptions, the database will also capture background reads of RFID tags. Logged with accurate timestamps, we can then conjecture that RFID reads that occurred within a few seconds of each other are probably physically nearby. If boxes have RFID tags on them, then I can probably get a reasonable idea, down to a box or two, of which box that elusive book is in. If I further put tags on certain immovable physical locations in the house, such as every few feet along shelving, then these will also be captured in the background and hopefully associated with objects nearby, giving a good physical idea of where things are.

What’s more, the simple act of looking for things using the RFID reader would help keep the proximity tables up-to-date, since it could of course log the RFID tags it sees on the way. The only discipline required to keep this info current is to periodically hover nearby storage areas when moving things around.

I like this concept a lot. That doesn’t mean it’s necessarily simple.

Implementation requirements

  • The cost of tagging an item must be less than $0.25 each. Ideally it would be $0.10 or less. We’re talking hundreds or thousands of items here, so even the $2.50 RFID tags for sale on hobbyist sites are way too expensive. RFID tags in industrial bulk quantities are needed, and cheaply.
  • Read range must be at least 1ft, and ideally 3ft, and ideally even around as many obstacles as possible. Shorter than that and it can’t even take in a whole box without pulling things out.
  • Cost kept as reasonable as possible.
  • Must be simple and unobtrusive, requiring little manual effort or discipline to maintain current data. This is the reason for RFID instead of barcodes; barcodes require much more specific action (scan the bin, scan the item) rather then just turn on the scanner and wave it around a bit.

Software side

I’m envisioning the software being split into two components. One would run on an embedded system with the RFID reader. Its job is simple transmitting of scanned RFIDs to the server, receiving instructions from the server, and generating a tone if it’s in search mode and the item being searched is nearby.

On the server lies a database. The database would contain descriptions for the objects that are tagged (so that the tag ID can be looked up). It would also contain the timestamped scan logs.

I envision a simple CGI-based frontend to it that is mobile-friendly, so a laptop, phone, tablet, etc. could be the user interface for the thing – saving the cost of a display and input device by reusing what most people already have.

This is the part I feel most qualified to work on already.

Hardware

The first question is what kind of RFID tags to use. Optimizing for cost per tag, the 800/900MHz UHF tags (EPC gen 2) seem ideal. I have found them in costs approaching $0.10 per tag when bought in rolls of 500 or 1000 Avery RFID labels. That’s reasonable.

The RFID reader is the more complicated part. UHF RFID readers are a lot more costly than their HF or LF counterparts. So far, the cheapest solution I have found started with a post about an Arduino UHF reader. It used a SolidDigi UHF reader board with UART interface for $177. That same board is also available with a USB interface at the same cost.

There is also the need for an antenna. There is a small 5dBi one rated 0-50cm for $8, or a $100 8dBi version rated 1-6m designed for wall mounting. They sell these in kit form that include power adapter, USB cables, etc. as well. The kit with the small antenna runs $192, including reader board.

Next is the compute platform. A DreamPlug might work for this at $160, though both the cost and the power consumption (5VDC 3A) are high. A Raspberry Pi seems perfect, though for whatever reason seem to be backordered by months everywhere and don’t include wifi. The Pi is $35, and the USB wifi is another $30, plus a cheap SD card, so we’re around $80 of computing. The running total of the project, then, is at least $272. Add on provisions for batteries, some sort of case, etc. and we’re probably past the $300 mark. That’s a lot cheaper than the $1000 for handheld RFID readers.

The final item is tags. Bulk tags can be found in the $100 to $200 range, making the total cost of the project $400 to $500. Higher than I’d like, but providing some valuable experience building something.

Risks

There are a few major risks to the project. First among them is read distance. If it’s not long enough, the usefulness of the project will be low. Fortunately, $100 gets a more high-gain antenna and I’d only be out the $8 if the cheaper one doesn’t pan out. But that’s something of a cold comfort, as it’s another, well, $100.

Having a bunch of RFID hardware can be used for all sorts of other interesting things, though, so it could perhaps be reused or repurposed.

Another risk is that RFID collisions wouldn’t be handled as intelligently as I’d like, meaning that the read range required to be useful would activate so many tags that collision algorithms break down. I don’t know enough about RFID collision algorithms to know if this is a serious councern.

Introducing the Command Line at 3 years

Jacob is very interested in how things work. He’s 3.5 years old, and into everything. He loves to look at propane tanks, as the pressure meter, and open the lids on top to see the vent underneath. Last night, I showed him our electric meter and the spinning disc inside it.

And, more importantly, last night I introduced him to the Linux command line interface, which I called the “black screen.” Now, Jacob can’t read yet, though he does know his letters. He had a lot of fun sort of exploring the system.

I ran “cat”, which will simply let him bash on the keyboard, and whenever he presses Enter, will echo what he typed back at him. I taught him how to hold Shift and press a number key to get a fun symbol. His favorite is the “hat” above the 6.

Then I ran tr a-z A-Z for him, and he got to watch the computer convert every lowercase letter into an uppercase letter.

Despite the fact that Jacob enjoys watching Youtube videos of trains and even a bit of Railroad Tycoon 3 with me, this was some pure exploration that he loves. Sometimes he’d say, “Dad, what will this key do?” Sometimes I didn’t know; some media keys did nothing, and some other keys caused weird things to appear. My keyboard has back and forward buttons designed to use with a web browser. He almost squealed with delight when he pressed the forward button and noticed it printed lots of ^@^@^@ characters on the screen when he held it down. “DAD! It makes LOTS of little hats! And what is that other thing?” (The at-sign).

I’ve decided it’s time to build a computer for Jacob. I have an old Sempron motherboard lying around, and an old 9″ black-and-white VGA CRT that’s pretty much indestructible, plus an old case or two. So it will cost nothing. This evening, Jacob will help me find the parts, and then he can help me assemble them all. (This should be interesting.)

Then I’ll install Debian while he sleeps, and by tomorrow he should be able to run cat all by himself. I think that, within a few days, he can probably remember how to log himself in and fire up a program or two without help.

I’m looking for suggestions for text-mode games appropriate to a 3-year-old. So far, I’ve found worm from bsdgames that looks good. It doesn’t require him to have quick reflexes or to read anything, and I think he’ll pick up using the arrow keys to move it just fine. I think that tetris is probably still a bit much, but maybe after he’s had enough of worm he would enjoy trying it.

I was asked on Twitter why I’ll be using the command line for him. There are a few reasons. One is that it will actually be usable on the 9″ screen, but another one is that it will expose the computer at a different level than a GUI would. He will inevitably learn about GUIs, but learning about a CLI isn’t inevitable. He won’t have to master coordination with a mouse right away, and there’s pretty much no way he can screw it up. (No, I won’t be giving him root yet!) Finally, it’s new and different to him, so he’s interested in it right now.

My first computer was a TRS-80 Color Computer (CoCo) II. Its primary interface, a BASIC interpreter, I guess counts as a command-line interface. I remember learning how to use that, and later DOS on a PC. Some of the games and software back then had no documentation and crashed often. Part of the fun, the challenge, and sometimes the frustration, was figuring out just what a program was supposed to do and how to use it. It will be fun to see what Jacob figures out.