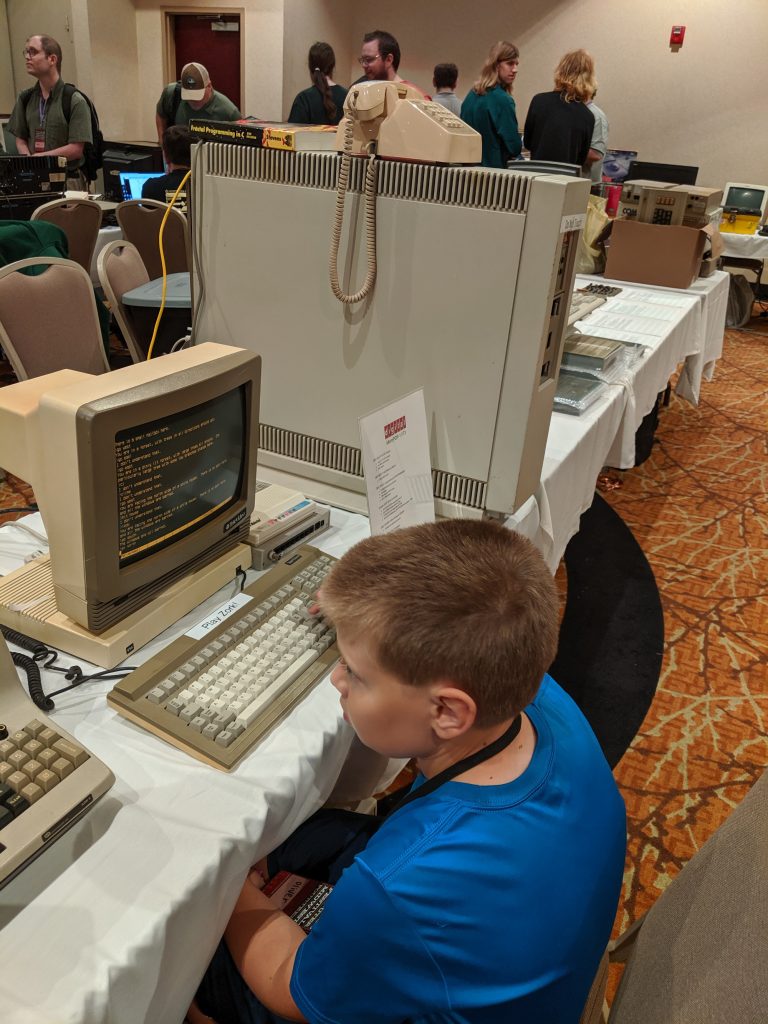
Category Archives: Linux

Easily Improving Linux Security with Two-Factor Authentication

2-Factor Authentication (2FA) is a simple way to help improve the security of your systems. It restricts the scope of damage if a machine is compromised. If, for instance, you have a security token or authenticator app on your phone that is required for ssh to a remote machine, then even if every laptop you use to connect to the remote is totally owned, an attacker cannot establish a new ssh session on their own.

There are a lot of tutorials out there on the Internet that get you about halfway there, so here is some more detail.

Background

In this article, I will be focusing on authentication in the style of Google Authenticator, which is a special case of OATH HOTP or TOTP. You can use the Google Authenticator app, FreeOTP, or a hardware token like Yubikey to generate tokens with this. They are all 100% compatible with Google Authenticator and libpam-google-authenticator.

The basic idea is that there is a pre-shared secret key. At each login, a different and unique token is required, which is generated based on the pre-shared secret key and some other information. With TOTP, the “other information” is the current time, implying that both machines must be reasably well in-sync time-wise. With HOTP, the “other information” is a count of the number of times the pre-shared key has been used. Both typically have a “window” on the server side that can let times within a certain number of seconds, or a certain number of login accesses, work.

The beauty of this system is that after the initial setup, no Internet access is required on either end to validate the key (though TOTP requires both ends to be reasonably in sync time-wise).

The basics: user account setup and ssh authentication

You can start with the basics by reading one of these articles: one, two, three. Debian/Ubuntu users will find both the pam module and the user account setup binary in libpam-google-authenticator.

For many, you can stop there. You’re done. But if you want to kick it up a notch, read on:

Enhancement 1: Requiring 2FA even when ssh public key auth is used

Let’s consider a scenario in which your system is completely compromised. Unless your ssh keys are also stored in something like a Yubikey Neo, they could wind up being compromised as well – if someone can read your files and sniff your keyboard, your ssh private keys are at risk.

So we can configure ssh and PAM so that a OTP token is required even for this scenario.

First off, in /etc/ssh/sshd_config, we want to change or add these lines:

UsePAM yes
ChallengeResponseAuthentication yes
AuthenticationMethods publickey,keyboard-interactive

This forces all authentication to pass two verification methods in ssh: publickey and keyboard-interactive. All users will have to supply a public key and then also pass keyboard-interactive auth. Normally keyboard-interactive auth prompts for a password, but we can change /etc/pam.d/sshd on this. I added this line at the very top of /etc/pam.d/sshd:

auth [success=done new_authtok_reqd=done ignore=ignore default=bad] pam_google_authenticator.so

This basically makes Google Authenticator both necessary and sufficient for keyboard-interactive in ssh. That is, whenever the system wants to use keyboard-interactive, rather than prompt for a password, it instead prompts for a token. Note that any user that has not set up google-authenticator already will be completely unable to ssh into their account.

Enhancement 1, variant 2: Allowing automated processes to root

On many of my systems, I have ~root/.ssh/authorized_keys set up to permit certain systems to run locked-down commands for things like backups. These are automated commands, and the above configuration will break them because I’m not going to be typing in codes at 3AM.

If you are very restrictive about what you put in root’s authorized_keys, you can exempt the root user from the 2FA requirement in ssh by adding this to sshd_config:

Match User root
  AuthenticationMethods publickey

This says that the only way to access the root account via ssh is to use the authorized_keys file, and no 2FA will be required in this scenario.

Enhancement 1, variant 2: Allowing non-pubkey auth

On some multiuser systems, some users may still want to use password auth rather than publickey auth. There are a few ways we can support that:

  1. Users without public keys will have to supply a OTP and a password, while users with public keys will have to supply public key, OTP, and a password
  2. Users without public keys will have to supply OTP or a password, while users with public keys will have to supply public key, OTP, or a password
  3. Users without public keys will have to supply OTP and a password, while users with public keys only need to supply the public key

The third option is covered in any number of third-party tutorials. To enable options 1 or 2, you’ll need to put this in sshd_config:

AuthenticationMethods publickey,keyboard-interactive keyboard-interactive

This means that to authenticate, you need to pass either publickey and then keyboard-interactive auth, or just keyboard-interactive auth.

Then in /etc/pam.d/sshd, you put this:

auth required pam_google_authenticator.so

As a sub-variant for option 1, you can add nullok to here to permit auth from people that do not have a Google Authenticator configuration.

Or for option 2, change “required” to “sufficient”. You should not add nullok in combination with sufficient, because that could let people without a Google Authenticator config authenticate completely without a password at all.

Enhancement 2: Configuring su

A lot of other tutorials stop with ssh (and maybe gdm) but forget about the other ways we authenticate or change users on a system. su and sudo are the two most important ones. If your root password is compromised, you don’t want anybody to be able to su to that account without having to supply a token. So you can set up google-authenticator for root.

Then, edit /etc/pam.d/su and insert this line after the pam_rootok.so line:

auth       required     pam_google_authenticator.so nullok

The reason you put this after pam_rootok.so is because you want to be able to su from root to any account without having to input a token. We add nullok to the end of this, because you may want to su to accounts that don’t have tokens. Just make sure to configure tokens for the root account first.

Enhancement 3: Configuring sudo

This one is similar to su, but a little different. This lets you, say, secure the root password for sudo.

Normally, you might sudo from your user account to root (if so configured). You might have sudo configured to require you to enter in your own password (rather than root’s), or to just permit you to do whatever you want as root without a password.

Our first step, as always, is to configure PAM. What we do here depends on your desired behavior: do you want to require someone to supply both a password and a token, or just a token, or require a token? If you want to require a token, put this at the top of /etc/pam.d/sudo:

auth [success=done new_authtok_reqd=done ignore=ignore default=bad] pam_google_authenticator.so

If you want to require a token and a password, change the bracketed string to “required”, and if you want a token or a password, change it to “sufficient”. As before, if you want to permit people without a configured token to proceed, add “nullok”, but do not use that with “sufficient” or the bracketed example here.

Now here comes the fun part. By default, if a user is required to supply a password to sudo, they are required to supply their own password. That does not help us here, because a user logged in to the system can read the ~/.google_authenticator file and easily then supply tokens for themselves. What you want to do is require them to supply root’s password. Here’s how I set that up in sudoers:

Defaults:jgoerzen rootpw
jgoerzen ALL=(ALL) ALL

So now, with the combination of this and the PAM configuration above, I can sudo to the root user without knowing its password — but only if I can supply root’s token. Pretty slick, eh?

Further reading

In addition to the basic tutorials referenced above, consider:

Edit: additional comments

Here are a few other things to try:

First, the libpam-google-authenticator module supports putting the Google Authenticator files in different locations and having them owned by a certain user. You could use this to, for instance, lock down all secret keys to be readable only by the root user. This would prevent users from adding, changing, or removing their own auth tokens, but would also let you do things such as reusing your personal token for the root account without a problem.

Also, the pam-oath module does much of the same things as the libpam-google-authenticator module, but without some of the help for setup. It uses a single monolithic root-owned password file for all accounts.

There is an oathtool that can be used to generate authentication codes from the command line.

I’m switching from git-annex to Syncthing

I wrote recently about using git-annex for encrypted sync, but due to a number of issues with it, I’ve opted to switch to Syncthing.

I’d been using git-annex with real but noncritical data. Among the first issues I noticed was occasional but persistent high CPU usage spikes, which once started, would persist apparently forever. I had an issue where git-annex tried to replace files I’d removed from its repo with broken symlinks, but the real final straw was a number of issues with the gcrypt remote repos. git-remote-gcrypt appears to have a number of issues with possible race conditions on the remote, and at least one of them somehow caused encrypted data to appear in a packfile on a remote repo. Why there was data in a packfile there, I don’t know, since git-annex is supposed to keep the data out of packfiles.

Anyhow, git-annex is still an awesome tool with a lot of use cases, but I’m concluding that live sync to an encrypted git remote isn’t quite there yet enough for me.

So I looked for alternatives. My main criteria were supporting live sync (via inotify or similar) and not requiring the files to be stored unencrypted on a remote system (my local systems all use LUKS). I found Syncthing met these requirements.

Syncthing is pretty interesting in that, like git-annex, it doesn’t require a centralized server at all. Rather, it forms basically a mesh between your devices. Its concept is somewhat similar to the proprietary Bittorrent Sync — basically, all the nodes communicate about what files and chunks of files they have, and the changes that are made, and immediately propagate as much as possible. Unlike, say, Dropbox or Owncloud, Syncthing can actually support simultaneous downloads from multiple remotes for optimum performance when there are many changes.

Combined with syncthing-inotify or syncthing-gtk, it has immediate detection of changes and therefore very quick propagation of them.

Syncthing is particularly adept at figuring out ways for the nodes to communicate with each other. It begins by broadcasting on the local network, so known nearby nodes can be found directly. The Syncthing folks also run a discovery server (though you can use your own if you prefer) that lets nodes find each other on the Internet. Syncthing will attempt to use UPnP to configure firewalls to let it out, but if that fails, the last resort is a traffic relay server — again, a number of volunteers host these online, but you can run your own if you prefer.

Each node in Syncthing has an RSA keypair, and what amounts to part of the public key is used as a globally unique node ID. The initial link between nodes is accomplished by pasting the globally unique ID from one node into the “add node” screen on the other; the user of the first node then must accept the request, and from that point on, syncing can proceed. The data is all transmitted encrypted, of course, so interception will not cause data to be revealed.

Really my only complaint about Syncthing so far is that, although it binds to localhost, the web GUI does not require authentication by default.

There is an ITP open for Syncthing in Debian, but until then, their apt repo works fine. For syncthing-gtk, the trusty version of the webupd8 PPD works in Jessie (though be sure to pin it to a low priority if you don’t want it replacing some unrelated Debian packages).

Detailed Smart Card Cryptographic Token Security Guide

After my first post about smartcards under Linux, I thought I would share some information I’ve been gathering.

This post is already huge, so I am not going to dive into — much — specific commands, but I am linking to many sources with detailed instructions.

I’ve reviewed several types of cards. For this review, I will focus on the OpenPGP card and the Yubikey NEO, since the Cardomatic Smartcard-HSM is not supported by the gpg version in Jessie.

Both cards are produced by people with strong support for the Free Software ecosystem and have strong cross-platform support with source code.

OpenPGP card: Basics with GnuPG

The OpenPGP card is well-known as one of the first smart cards to work well on Linux. It is a single-application card focused on use with GPG. Generally speaking, by the way, you want GPG2 for use with smartcards.

Basically, this card contains three slots: decryption, signing, and authentication slots. The concept is that the private key portions of the keys used for these items are stored only on the card, can never be extracted from the card, and the cryptographic operations are performed on the card. There is more information in my original post. In a fairly rare move for smartcards, this card supports 4096-byte RSA keys; most are restricted to 2048-byte keys.

The FSF Europe hands these out to people and has a lot of good information about them online, including some HOWTOs. The official GnuPG smart card howto is 10 years old, and although it has some good background, I’d suggest using the FSFE instructions instead.

As you’ll see in a bit, most of this information also pertains to the OpenPGP mode of the Yubikey Neo.

OpenPGP card: Other uses

Of course, this is already pretty great to enhance your GPG security, but there’s a lot more that you can do with this card to add two-factor authentication (2FA) to a lot of other areas. Here are some pointers:

OpenPGP card: remote authentication with ssh

You can store the private part of your ssh key on the card. Traditionally, this was only done by using the ssh agent emulation mode of gnupg-agent. This is still possible, of course.

Now, however, the OpenSC project now supports the OpenPGP card as a PKCS#11 and PKCS#15 card, which means it works natively with ssh-agent as well. Try just ssh-add -s /usr/lib/x86_64-linux-gnu/pkcs11/opensc-pkcs11.so if you’ve put a key in the auth slot with GPG. ssh-add -L will list its fingerprint for insertion into authorized_keys. Very simple!

As an aside: Comments that you need scute for PKCS#11 support are now outdated. I do not recommend scute. It is quite buggy.

OpenPGP card: local authentication with PAM

You can authenticate logins to a local machine by using the card with libpam-poldi — here are some instructions.

Between the use with ssh and the use with PAM, we have now covered 2FA for both local and remote use in Unix environments.

OpenPGP card: use on Windows

Let’s move on to Windows environments. The standard suggestion here seems to be the mysmartlogon OpenPGP mini-driver. It works with some sort of Windows CA system, or the local accounts using EIDAuthenticate. I have not yet tried this.

OpenPGP card: Use with X.509 or Windows Active Directory

You can use the card in X.509 mode via these gpgsm instructions, which apparently also work with Windows Active Directory in some fashion.

You can also use it with web browsers to present a certificate from a client for client authentication. For example, here are OpenSC instructions for Firefox.

OpenPGP card: Use with OpenVPN

Via the PKCS#11 mode, this card should be usable to authenticate a client to OpenVPN. See the official OpenVPN HOWTO or these other instructions for more.

OpenPGP card: a note on PKCS#11 and PKCS#15 support

You’ll want to install the opensc-pkcs11 package, and then give the path /usr/lib/x86_64-linux-gnu/pkcs11/opensc-pkcs11.so whenever something needs the PKCS#11 library. There seem to be some locking/contention issues between GPG2 and OpenSC, however. Usually killing pcscd and scdaemon will resolve this.

I would recommend doing manipulation operations (setting PINs, generating or uploading keys, etc.) via GPG2 only. Use the PKCS#11 tools only to access.

OpenPGP card: further reading

Kernel Concepts also has some nice readers; you can get this card in a small USB form-factor by getting the mini-card and the Gemalto reader.

Yubikey Neo Introduction

The Yubikey Neo is a fascinating device. It is a small USB and NFC device, a little smaller than your average USB drive. It is a multi-application device that actually has six distinct modes:

  • OpenPGP JavaCard Applet (pc/sc-compatible)
  • Personal Identity Verification [PIV] (pc/sc-compatible, PKCS#11-compatible in Windows and OpenSC)
  • Yubico HOTP, via your own auth server or Yubico’s
  • OATH, with its two sub-modes:
    • OATH TOTP, with a mobile or desktop helper app (drop-in for Google Authenticator
    • OATH HOTP
  • Challenge-response mode
  • U2F (Universal 2nd Factor) with Chrome

There is a ton to digest with this device.

Yubikey Neo Basics

By default, the Yubikey Neo is locked to only a subset of its features. Using the yubikey-personalization tool (you’ll need the version in stretch; jessie is too old), you can use ykpersonalize -m86 to unlock the full possibilities of the card. Run that command, then unplug and replug the device.

It will present itself as a USB keyboard as well as a PC/SC-compatible card reader. It has a capacitive button, which is used to have it generate keystrokes to input validation information for HOTP or HMAC validation. It has two “slots” that can be configured with HMAC and HOTP; a short button press selects the default slot and a long press selects slot .

But before we get into that, let’s step back at some basics.

opensc-tool –list-algorithms claims this card supports RSA with 1024, 2048, and 3072 sizes, and EC with 256 and 384-bit sizes. I haven’t personally verified anything other than RSA-2048 though.

Yubikey Neo: OpenPGP support

In this mode, the card is mostly compatible with the physical OpenPGP card. I say “mostly” because there are a few protocol differences I’ll get into later. It is also limited to 2048-byte keys.

Support for this is built into GnuPG and the GnuPG features described above all work fine.

In this mode, it uses firmware from the Yubico fork of the JavaCard OpenPGP Card applet. There are Yubico-specific tutorials available, but again, most of the general GPG stuff applies.

You can use gnupg-agent to use the card with SSH as before. However, due to some incompatibilities, the OpenPGP applet on this card cannot be used as a PKCS#11 card with either scute or OpenSC. That is not exactly a huge problem, however, as the card has another applet (PIV) that is compatible with OpenSC and so this still provides an avenue for SSH, OpenVPN, Mozilla, etc.

It should be noted that the OpenPGP applet on this card can also be used with NFC on Android with the OpenKeychain app. Together with pass (or its Windows, Mac, or phone ports), this makes a nicely secure system for storing passwords.

Yubikey Neo: PKCS#11 with the PIV applet

There is also support for the PIV standard on the Yubikey Neo. This is supported by default on Linux (via OpenSC) and Windows and provides a PKCS#11-compabible store. It should, therefore, be compatible with ssh-agent, OpenVPN, Active Directory, and all the other OpenPGP card features described above. The only difference is that it uses storage separate from the OpenPGP applet.

You will need one of the Yubico PIV tools to configure the key for it; in Debian, the yubico-piv-tool from stretch does this.

Here are some instructions on using the Yubikey Neo in PIV mode:

A final note: for security, it’s important to change the management key and PINs before deploying the PIV mode.

I couldn’t get this to work with Firefox, but it worked pretty much everywhere else.

Yubikey Neo: HOTP authentication

This is the default mode for your Yubikey; all other modes require enabling with ykpersonalize. In this mode, a 128-bit AES key stored on the Yubikey is used to generate one-time passwords (OTP). (This key was shared in advance with the authentication server.) A typical pattern would be for three prompts: username, password, and Yubikey HOTP. The user clicks in the Yubikey HOTP field, touches the Yubikey, and their one-time token is pasted in.

In the background, the service being authenticated to contacts an authentication server. This authentication server can be either your own (there are several open source implementations in Debian) or the free Yubicloud.

Either way, the server decrypts the encrypted part of the OTP, performs validity checks (making sure that the counter is larger than any counter it’s seen before, etc) and returns success or failure back to the service demanding authentication.

The first few characters of the posted auth contain the unencrypted key ID, and thus it can also be used to provide username if desired.

Yubico has provided quite a few integrations and libraries for this mode. A few highlights:

You can also find some details on the OTP mode. Here’s another writeup.

This mode is simple to implement, but it has a few downsides. One is that it is specific to the Yubico line of products, and thus has a vendor lock-in factor. Another is the dependence on the authentication server; this creates a potential single point of failure and can be undesireable in some circumtances.

Yubikey Neo: OATH and HOTP and TOTP

First, a quick note: OATH and OAuth are not the same. OATH is an authentication protocol, and OAuth is an authorization protocol. Now then…

Like Yubikey HOTP, OATH (both HOTP and TOTP) modes rely on a pre-shared key. (See details in the Yubico article.) Let’s talk about TOTP first. With TOTP, there is a pre-shared secret with each service. Each time you authenticate to that service, your TOTP generator combines the timestamp with the shared secret using a HMAC algorithm and produces a OTP that changes every 30 seconds. Google Authenticator is a common example of this protocol, and this is a drop-in replacement for it. Gandi has a nice description of it that includes links to software-only solutions on various platforms as well.

With the Yubikey, the shared secrets are stored on the card and processed within it. You cannot extract the shared secret from the Yubikey. Of course, if someone obtains physical access to your Yubikey they could use the shared secret stored on it, but there is no way they can steal the shared secret via software, even by compromising your PC or phone.

Since the Yubikey does not have a built-in clock, TOTP operations cannot be completed solely on the card. You can use a PC-based app or the Android application (Play store link) with NFC to store secrets on the device and generate your TOTP codes. Command-line users can also use the yubikey-totp tool in the python-yubico package.

OATH can also use HOTP. With HOTP, an authentication counter is used instead of a clock. This means that HOTP passwords can be generated entirely within the Yubikey. You can use ykpersonalize to configure either slot 1 or 2 for this mode, but one downside is that it can really only be used with one service per slot.

OATH support is all over the place; for instance, there’s libpam-oath from the OATH toolkit for Linux platforms. (Some more instructions on this exist.)

Note: There is another tool from Yubico (not in Debian) that can apparently store multiple TOTP and HOTP codes in the Yubikey, although ykpersonalize and other documentation cannot. It is therefore unclear to me if multiple HOTP codes are supported, and how..

Yubikey Neo: Challenge-Response Mode

This can be useful for doing offline authentication, and is similar to OATH-HOTP in a sense. There is a shared secret to start with, and the service trying to authenticate sends a challenge to the token, which must supply an appropriate response. This makes it only suitable for local authentication, but means it can be done fairly automatically and optionally does not even require a button press.

To muddy the waters a bit, it supports both “Yubikey OTP” and HMAC-SHA1 challenge-response modes. I do not really know the difference. However, it is worth noting that libpam-yubico works with HMAC-SHA1 mode. This makes it suitable, for instance, for logon passwords.

Yubikey Neo: U2F

U2F is a new protocol for web-based apps. Yubico has some information, but since it is only supported in Chrome, it is not of interest to me right now.

Yubikey Neo: Further resources

Yubico has a lot of documentation, and in particular a technical manual that is actually fairly detailed.

Closing comments

Do not think a hardware security token is a panacea. It is best used as part of a multi-factor authentication system; you don’t want a lost token itself to lead to a breach, just as you don’t want a compromised password due to a keylogger to lead to a breach.

These things won’t prevent someone that has compromised your PC from abusing your existing ssh session (or even from establishing new ssh sessions from your PC, once you’ve unlocked the token with the passphrase). What it will do is prevent them from stealing your ssh private key and using it on a different PC. It won’t prevent someone from obtaining a copy of things you decrypt on a PC using the Yubikey, but it will prevent them from decrypting other things that used that private key. Hopefully that makes sense.

One also has to consider the security of the hardware. On that point, I am pretty well satisfied with the Yubikey; large parts of it are open source, and they have put a lot of effort into hardening the hardware. It seems pretty much impervious to non-government actors, which is about the best guarantee a person can get about anything these days.

I hope this guide has been helpful.

First steps with smartcards under Linux and Android — hard, but it works

Well this has been an interesting project.

It all started with a need to get better password storage at work. We wound up looking heavily at a GPG-based solution. This prompted the question: how can we make it even more secure?

Well, perhaps, smartcards. The theory is this: a smartcard holds your private keys in a highly-secure piece of hardware. The PC can never actually access the private keys. Signing and decrypting operations are done directly on the card to prevent the need to export the private key material to the PC. There are lots of “standards” to choose from (PKCS#11, PKCS#15, and OpenPGP card specs) that are relevant here. And there are ways to use SSH and OpenVPN with some of these keys too. Access to the card is protected by a passphrase (called a “PIN” in smartcard lingo, even though it need not be numeric). These smartcards might be USB sticks, or cards you pop into a reader. In any case, you can pop them out when not needed, pop them in to use them, and… well, pretty nice, eh?

So that’s the theory. Let’s talk a bit of reality.

First of all, it is hard for a person like me to evaluate how secure my data is in hardware. There was a high-profile bug in the OpenPGP JavaCard applet used by Yubico that caused the potential to use keys without a PIN, for instance. And how well protected is the key in the physical hardware? Granted, in most of these cards you’re talking serious hardware skill to compromise them, but still, this is unknown in absolute terms.

Here’s the bigger problem: compatibility. There are all sorts of card readers, but compatibility with pcsc-tools and pcscd on Linux seems pretty good. But the cards themselves — oh my. PKCS#11 defines an interface API, but each vendor would provide their own .so or .dll file to interface. Some cards (for instance, the ACOS5-64 mentioned on the Debian wiki!) are made by vendors that charge $50 for the privilege of getting the drivers needed to make them work… and they’re closed-source proprietary drivers at that.

Some attempts

I ordered several cards to evaluate: the OpenPGP card, specifically designed to support GPG; the ACOS5-64 card, the JavaCOS A22, the Yubikey Neo, and a simple reader listed on the GPG smartcard howto.

The OpenPGP card and ACOS5-64 are the only ones in the list that support 4096-bit RSA keys due to the computational demands of them. The others all support 2048-bit RSA keys.

The JavaCOS requires the user to install a JavaCard applet to the card to make it useable. The Yubico OpenPGP applet works here, along with GlobalPlatform to install it. I am not sure just how solid it is. The Yubikey Neo has yet to arrive; it integrates some interesting OAUTH and TOTP capabilities as well.

I found that Debian’s wiki page for smartcards lists a bunch of them that are not really useable using the tools in main. The ACOS5-64 was such a dud. But I got the JavaCOS A22 working quite nicely. It’s also NFC-enabled and works perfectly with OpenKeyChain on Android (looking like a “Yubikey Neo” to it, once the OpenPGP applet is installed). I’m impressed! Here’s a way to be secure with my smartphone without revealing everything all the time.

Really the large amount of time is put into figuring out how all this stuff fits together. I’m getting there, but I’ve got a ways to go yet.

Update: Corrected to read “signing and decrypting” rather than “signing and encrypting” operations are being done on the card. Thanks to Benoît Allard for catching this error.

Roundup of remote encrypted deduplicated backups in Linux

Since I wrote last about Linux backup tools, back in a 2008 article about BackupPC and similar toools and a 2011 article about dedpulicating filesystems, I’ve revisited my personal backup strategy a bit.

I still use ZFS, with my tool “simplesnap” that I wrote about in 2014 to perform local backups to USB drives, which get rotated offsite periodically. This has the advantage of being very fast and very secure, but I also wanted offsite backups over the Internet. I began compiling criteria, which ran like this:

  • Remote end must not need any special software installed. Storage across rsync, sftp, S3, WebDAV, etc. should all be good candidates. The remote end should not need to support hard links or symlinks, etc.
  • Cross-host deduplication at at least the file level is required, so if I move a 4GB video file from one machine to another, my puny DSL wouldn’t have to re-upload it.
  • All data that is stored remotely must be 100% encrypted 100% of the time. I must not need to have any trust at all in the remote end.
  • Each backup after the first must send only an incremental’s worth of data across the line. No periodic re-uploading of the entire data set can be done.
  • The repository format must be well-documented and stable.

So, how did things stack up?

Didn’t meet criteria

A lot of popular tools didn’t meet the criteria. Here are some that I considered:

  • BackupPC requires software on the remote end and does not do encryption.
  • None of the rsync hardlink tree-based tools are suitable here.
  • rdiff-backup requires software on the remote end and does not do encryption or dedup.
  • duplicity requires a periodic re-upload of a full backup, or incremental chains become quite long and storage-inefficient. It also does not support dedup, although it does have an impressive list of “dumb” storage backends.
  • ZFS, if used to do backups the efficient way, would require software to be installed on the remote end. If simple “zfs send” images are used, the same limitations as with duplicity apply.
  • The tools must preserve POSIX attributes like uid/gid, permission bits, symbolic links, hard links, etc. Support for xattrs is also desireable but not required.
  • bup and zbackup are both interesting deduplicators, but do not yet have support for removing old data, so are impractical for this purpose.
  • burp requires software on the server side.

Obnam and Attic/Borg Backup

Obnam and Attic (and its fork Borg Backup) are both programs that have a similar concept at their heart, which is roughly this: the backup repository stores small chunks of data, indexed by a checksum. Directory trees are composed of files that are assembled out of lists of chunks, so if any given file matches another file already in the repository somewhere, the added cost is just a small amount of metadata.

Obnam was eventually my tool of choice. It has built-in support for sftp, but its reliance on local filesystem semantics is very conservative and it works fine atop davfs2 (and, I’d imagine, other S3-backed FUSE filesystems). Obnam’s repository format is carefully documented and it is very conservatively designed through and through — clearly optimized for integrity above all else, including speed. Just what a backup program should be. It has a lot of configurable options, including chunk size, caching information (dedup tables can be RAM-hungry), etc. These default to fairly conservative values, and the performance of Obnam can be significantly improved with a few simple config tweaks.

Attic was also a leading contender. It has a few advantages over Obnam, actually. One is that it uses an rsync-like rolling checksum method. This means that if you add 1 byte at the beginning of a 100MB file, Attic will upload a 1-byte chunk and then reference the other chunks after that, while Obnam will have to re-upload the entire file, since its chunks start at the beginning of the file in fixed sizes. (The only time Obnam has chunks smaller than its configured chunk size is with very small files or the last chunk in a file.) Another nice feature of Attic is its use of “packs”, where it groups chunks together into larger pack files. This can have significant performance advantages when backing up small files, especially over high-latency protocols and links.

On the downside, Attic has a hardcoded fairly small chunksize that gives it a heavy metadata load. It is not at all as configurable as Obnam, and unlike Obnam, there is nothing you can do about this. The biggest reason I avoided it though was that it uses a single monolithic index file that would have to be uploaded from scratch after each backup. I calculated that this would be many GB in size, if not even tens of GB, for my intended use, and this is just not practical over the Internet. Attic assumes that if you are going remote, you run Attic on the remote so that the rewrite of this file doesn’t have to send all the data across the network. Although it does work atop davfs2, this support seemed like an afterthought and is clearly not very practical.

Attic did perform much better than Obnam in some ways, largely thanks to its pack support, but the monolothic index file was going to make it simply impractical to use.

There is a new fork of Attic called Borg that may, in the future, address some of these issues.

Brief honorable mentions: bup, zbackup, syncany

There are a few other backup tools that people are talking about which do dedup. bup is frequently mentioned, but one big problem with it is that it has no way to delete old data! In other words, it is more of an archive than a backup tool. zbackup is a really neat idea — it dedups anything you feed at it, such as a tar stream or “zfs send” stream, and can encrypt, too. But it doesn’t (yet) support removing old data either.

syncany is fundamentally a syncing tool, but can also be used from the command line to do periodic syncs to a remote. It supports encryption, sftp, webdave, etc. natively, and runs on quite a number of platforms easily. However, it doesn’t store a number of POSIX attributes, such as hard links, uid/gid owner, ACL, xattr, etc. This makes it impractical for use for even backing up my home directory; I make fairly frequent use of ln, both with and without -s. If there were some tool to create/restore archives of metadata, that might work out better.

First impressions and review of OwnCloud

In my recent post (I give up on Google), a lot of people suggested using OwnCloud as a replacement for several Google services. I’ve been playing around with it for a few days, and it is something of a mix of awesome and disappointing, in my opinion.

Files

OwnCloud started as a file-sync tool, somewhat akin to Google Drive and Dropbox. It has clients for every platform, and it is also a client for every platform: you can have subfolders of your OwnCloud installation stored on WebDav, *FTP*, Google Drive, Dropbox, you name it. It is a pretty nice integrator of other storage services, and provides the only way to use some of them on Linux (*cough* Google Drive *cough*)

One particularly interesting feature is the live editing in the browser of ODT, DOCX, and TXT files. This is somewhat similar to Google Docs and the only such thing I’ve seen in Open Source software. It writes changes directly back to the documents and, in my limited testing, seems to work well. A very nice feature!

I’ve tested the syncing only on Linux so far, but it looks solid.

There are two surprising issues, however: there is no deduplication and no delta-uploads. Add 10 bytes to the end of a 1GB file, and you re-upload the 1GB file. Thankfully the OwnCloud GUI client is smart enough to use inotify to notice an mv, but my guess is — and I haven’t tested this, but apparently OwnCloud doesn’t use hashes at all — that the CLI client would require a reupload after any mv, because it doesn’t run continuously.

In some situations, Syncany may be a useful work-around for this, as it does chunk-based dedup and client-side encryption. However, you would lose a lot of the sharing features inside OwnCloud by doing this, and the integration with the OwnCloud “apps” for photos, videos, and music.

The Android/mobile apps support all the usual auto-upload options.

Calendar

A lot of people report using OwnCloud as a calendar server, and it does indeed use CalDAV. With a program like DAVDroid or Mozilla Lightning, this makes, in theory, a full-functioning calendar syncing tool. There is, of course, also a web interface to the calendar. It, sadly, is limited. Or shall we say, VERY limited. Even something like sending an invite is missing — and in fact, the GUI for sharing an event is baffling. You can share it with someone, they get no say in whether or not it shows up, and it shows up on their calendar on the web only (not on synced copies) and they have no way to remove it!

Sharing calendars is similar; you can hide the display of any one of your calendars on the web interface, but not of any calendars shared with you. Baffling.

Address Book

I haven’t tested this yet, but there’s not much to test, I suspect. It can be shared with others, which I could see as a nice feature.

Bookmarks

An interesting bookmarks manager, though mysteriously not with Firefox sync support. There is Chrome sync support, and a separate Mozilla Sync support, but it doesn’t provide cross-browser syncing, apparently.

Music

It is designed to present an interface to music that is stored in Files. It provides an Ampache-compatible API, so there are a lot of clients that can stream music. It has very few options, not even for transcoding, so I don’t see how it would be useful for my FLAC collection.

Pictures

Sort of a gallery view of photos synced up with Files. Very basic. Has a sharing button to share a link to an entire folder, but no option to embed photos in blog posts at a lower resolution or shortcut to sharing individual photos.

Notes, Tasks, etc.

I haven’t had the chance to look at this much. Some of them sync to various clients. The Notes are saved as HTML files that get synced down.

Clients overall

There is a very helpful page that lists all the sync clients for OwnCloud — not just for files, but also for calendars, contacts, etc. The list is extensive!

Other options

The two other Open Source options mentioned on my blog post were Kolab and Sogo, and there is also Zimbra which also has a community edition. The Debian Groupware page lists a number of other groupware options as well. Citadel caught my eye (wow, it’s still around!). Sogo has ActiveSync support, which might make phone integration a lot easier. It is not dead-simple to set up like OwnCloud is, though, so I haven’t tried it out, but I will probably be looking at it and Citadel next.

Reactions to “Has modern Linux lost its way?” and the value of simplicity

Apparently I touched a nerve with my recent post about the growing complexity of issues.

There were quite a few good comments, which I’ll mention here. It’s provided me some clarity on the problem, in fact. I’ll try to distill a few more thoughts here.

The value of simplicity and predictability

The best software, whether it’s operating systems or anything else, is predictable. You read the documentation, or explore the interface, and you can make a logical prediction that “when I do action X, the result will be Y.” grep and cat are perfect examples of this.

The more complex the rules in the software, the more hard it is for us to predict. It leads to bugs, and it leads to inadvertant security holes. Worse, it leads to people being unable to fix things themselves — one of the key freedoms that Free Software is supposed to provide. The more complex software is, the fewer people will be able to fix it by themselves.

Now, I want to clarify: I hear a lot of talk about “ease of use.” Gnome removes options in my print dialog box to make it “easier to use.” (This is why I do not use Gnome. It actually makes it harder to use, because now I have to go find some obscure way to just make the darn thing print.) A lot of people conflate ease of use with ease of learning, but in reality, I am talking about neither.

I am talking about ease of analysis. The Linux command line may not have pointy-clicky icons, but — at least at one time — once you understood ls -l and how groups, users, and permission bits interacted, you could fairly easily conclude who had access to what on a system. Now we have a situation where the answer to this is quite unclear in terms of desktop environments (apparently some distros ship network-manager so that all users on the system share the wifi passwords they enter. A surprise, eh?)

I don’t mind reading a manpage to learn about something, so long as the manpage was written to inform.

With this situation of dbus/cgmanager/polkit/etc, here’s what it feels like. This, to me, is the crux of the problem:

It feels like we are in a twisty maze, every passage looks alike, and our flashlight ran out of battieries in 2013. The manpages, to the extent they exist for things like cgmanager and polkit, describe the texture of the walls in our cavern, but don’t give us a map to the cave. Therefore, we are each left to piece it together little bits at a time, but there are traps that keep moving around, so it’s slow going.

And it’s a really big cave.

Other user perceptions

There are a lot of comments on the blog about this. It is clear that the problem is not specific to Debian. For instance:

  • Christopher writes that on Fedora, “annoying, niggling problems that used to be straightforward to isolate, diagnose and resolve by virtue of the platform’s simple, logical architecture have morphed into a morass that’s worse than the Windows Registry.” Alessandro Perucchi adds that he’s been using Linux for decades, and now his wifi doesn’t work, suspend doesn’t work, etc. in Fedora and he is surprisingly unable to fix it himself.
  • Nate bargman writes, in a really insightful comment, “I do feel like as though I’m becoming less a master of and more of a slave to the computing software I use. This is not a good thing.”
  • Singh makes the valid point that this stuff is in such a state of flux that even if a person is one of the few dozen in the world that understand what goes into a session today, the knowledge will be outdated in 6 months. (Hal, anyone?)

This stuff is really important, folks. People being able to maintain their own software, work with it themselves, etc. is one of the core reasons that Free Software exists in the first place. It is a fundamental value of our community. For decades, we have been struggling for survival, for relevance. When I started using Linux, it was both a question and an accomplishment to have a useable web browser on many platforms. (Netscape Navigator was closed source back then.) Now we have succeeded. We have GPL-licensed and BSD-licensed software running on everything from our smartphones to cars.

But we are snatching defeat from the jaws of victory, because just as we are managing to remove the legal roadblocks that kept people from true mastery of their software, we are erecting technological ones that make the step into the Free Software world so much more difficult than it needs to be.

We no longer have to craft Modelines for X, or compile a kernel with just the right drivers. This is progress. Our hardware is mostly auto-detected and our USB serial dongles work properly more often on Linux than on Windows. This is progress. Even our printers and scanners work pretty darn well. This is progress, too.

But in the place of all these things, now we have userspace mucking it up. We have people with mysterious errors that can’t be easily assisted by the elders in the community, because the elders are just as mystified. We have bugs crop up that would once have been shallow, but are now non-obvious. We are going to leave a sour taste in people’s mouth, and stir repulsion instead of interest among those just checking it out.

The ways out

It’s a nasty predicament, isn’t it? What are your ways out of that cave without being eaten by a grue?

Obviously the best bet is to get rid of the traps and the grues. Somehow the people that are working on this need to understand that elegance is a feature — a darn important feature. Sadly I think this ship may have already sailed.

Software diagnosis tools like Enrico Zini’s seat-inspect idea can also help. If we have something like an “ls for polkit” that can reduce all the complexity to something more manageable, that’s great.

The next best thing is a good map — good manpages, detailed logs, good error messages. If software would be more verbose about the permission errors, people could get a good clue about where to look. If manpages for software didn’t just explain the cavern wall texture, but explain how this room relates to all the other nearby rooms, it would be tremendously helpful.

At present, I am unsure if our problem is one of very poor documentation, or is so bad that good documentation like this is impossible because the underlying design is so complex it defies being documented in something smaller than a book (in which case, our ship has not just sailed but is taking on water).

Counter-argument: progress

One theme that came up often in the comments is that this is necessary for progress. To a certain extent, I buy that. I get why udev is important. I get why we want the DE software to interact well. But here’s my thing: this already worked well in wheezy. Gnome, XFCE, and KDE software all could mount/unmount my drives. I am truly still unsure what problem all this solved.

Yes, cloud companies have demanding requirements about security. I work for one. Making security more difficult to audit doesn’t do me any favors, I can assure you.

The systemd angle

To my surprise, systemd came up quite often in the discussion, despite the fact that I mentioned I wasn’t running systemd-sysv. It seems like the new desktop environemt ecosystem is “the systemd ecosystem” in a lot of people’s minds. I’m not certain this is justified; systemd was not my first choice, but as I said in an earlier blog post, “jessie will still boot”.

A final note

I still run Debian on all my personal boxes and I’m not going to change. It does awesome things. For under $100, I built a music-playing system, with Raspberry Pis, fully synced throughout my house, using a little scripting and software. The same thing from Sonos would have cost thousands. I am passionate about this community and its values. Even when jessie releases with polkit and all the rest, I’m still going to use it, because it is still a good distro from good people.

Backing up every few minutes with simplesnap

I’ve written a lot lately about ZFS, and one of its very nice features is the ability to make snapshots that are lightweight, space-efficient, and don’t hurt performance (unlike, say, LVM snapshots).

ZFS also has “zfs send” and “zfs receive” commands that can send the content of the snapshot, or a delta between two snapshots, as a data stream – similar in concept to an amped-up tar file. These can be used to, for instance, very efficiently send backups to another machine. Rather than having to stat() every single file on a filesystem as rsync has to, it sends effectively an intelligent binary delta — which is also intelligent about operations such as renames.

Since my last search for backup tools, I’d been using BackupPC for my personal systems. But since I switched them to ZFS on Linux, I’ve been wanting to try something better.

There are a lot of tools out there to take ZFS snapshots and send them to another machine, and I summarized them on my wiki. I found zfSnap to work well for taking and rotating snapshots, but I didn’t find anything that matched my criteria for sending them across the network. It seemed par for the course for these tools to think nothing of opening up full root access to a machine from others, whereas I would much rather lock it down with command= in authorized_keys.

So I wrote my own, called simplesnap. As usual, I wrote extensive documentation for it as well, even though it is very simple to set up and use.

So, with BackupPC, a backup of my workstation took almost 8 hours. (Its “incremental” might take as few as 3 hours) With ZFS snapshots and simplesnap, it takes 25 seconds. 25 seconds!

So right now, instead of backing up once a day, I back up once an hour. There’s no reason I couldn’t back up every 5 minutes, in fact. The data consumes less space, is far faster to manage, and doesn’t require a nightly hours-long cleanup process like BackupPC does — zfs destroy on a snapshot just takes a few seconds.

I use a pair of USB disks for backups, and rotate them to offsite storage periodically. They simply run ZFS atop dm-crypt (for security) and it works quite well even on those slow devices.

Although ZFS doesn’t do file-level dedup like BackupPC does, and the lz4 compression I’ve set ZFS to use is less efficient than the gzip-like compression BackupPC uses, still the backups are more space-efficient. I am not quite sure why, but I suspect it’s because there is a lot less metadata to keep track of, and perhaps also because BackupPC has to store a new copy of a file if even a byte changes, whereas ZFS can store just the changed blocks.

Incidentally, I’ve packaged both zfSnap and simplesnap for Debian and both are waiting in NEW.

Migrated from Hetzner to OVH hosting

Since August 2011, my sites such as complete.org have been running on a Xen-backed virtual private server (VPS) at Hetzner Online, based in Germany. I had what they called their VQ19 package, which included 2GB RAM, 80GB HDD, 100Mb NIC and 4TB transfer.

Unlike many other VPS hosts, I never had performance problems. However, I did sometimes have hardware problems with the host, and it could take hours to resolve. Their tech support only works business hours German time, which was also a problem.

Meanwhile, OVH, a large European hosting company, recently opened a datacenter in Canada. Although they no longer offer their value-line Kimsufi dedicated servers there — starting at $11.50/mo — they do offer their midrange SoYouStart servers there. $50/mo gets a person a 4-core 3.2GHz Xeon server with 32GB RAM, 2x2TB SATA HDD, 200Mbps bandwidth. Not bad at all! The Kimsufi options are still good for lower-end needs as well.

I signed up for one of the SoYouStart servers. I’ve been pleased with my choice to migrate, and at the possibilities that having hardware like that at my disposal open up, but it is not without its downside.

The primary downside is lack of any kind of KVM console. If the server doesn’t boot, I can’t see the Grub error message (or whatever) behind it. They do provide hardware support and automatic technician dispatching when the server isn’t pingable, but… they state they have no KVM access at all. They support many OS flavors, and have a premade image for them, but there is no using a custom ISO to install; if you want ZFS on Linux, for instance, you can’t very easily build it into root.

My server was promised within 72 hours, but delivered much quicker: within about 1. I had two times they said they had to replace a motherboard within the first day; once they did it in 30 minutes, and the other took them 2.5 hours for some reason. They do have phone support, which answers almost immediately, but the people there are not the people actually in the datacenter. It was frustrating with a server down for hours and nobody really commenting on what was going on.

The server performs quite well, and after the initial issues, I’ve been happy.

I was initially planning an all-ZFS installation. SoYouStart does offer a rescue environment, but it doesn’t support ZFS, so I figured I better stick with an ext4 root at least. The default Debian install uses RAID1 on md-raid, with a 20GB root partition and the rest of the 2TB drive in /home, and then a swap partition on each drive (mysteriously NOT in the RAID!) So I broke the mirror on /home and converted those into the two legs of a mirrored vdev for a zpool.

I run all of the real work inside KVM VMs, so that should minimize the number of times I have to do anything to the root filesystem that could cause trouble.

SoYouStart includes 100GB of space on a separate FTP server for backup purposes. I have scripts that upload nightly tarballs of the root filesystem, plus full “zfs send” streams of everything else. Every hour, it uploads an incremental “zfs send” stream as well. This all works quite nicely; even if the machine is a complete loss, I’d never lose more than an hour’s work, and could restore it completely from a rescue environment. Very nice!

I’ll write more in a few days about the ZFS setup I’m using, and some KVM discoveries as well.

VirtFS isn’t quite ready

Despite claims to the contrary [PDF], VirtFS — the 9P-based virtio KVM/QEMU layer designed to pass through a host’s filesystem to the guest — is quite slow. I have yet to get it to perform at even 1/10 the speed of the virtual block device (VBD). That’s unfortunate, because in theory it should be significantly faster. At this rate, I suspect even NFS will be significantly faster.

Beyond that, it seems impossible to use VirtFS as the root filesystem in a VM, at least with Debian; initramfs-tools doesn’t know how to build an initrd in that situation, and the support is just not there.

It would make a great combination with btrfs or zfs, but unfortunately looks to be just not ready yet.