Here, in classic Goerzen deep dive fashion, is more information than you knew you wanted about a topic you’ve probably never thought of. I found it pretty interesting, because it took me down a rabbit hole of subsystems I’ve never worked with much and a mishmash of 1980s and 2020s tech.
I had previously tried and failed to get an actual 80x25 Linux console, but I’ve since figured it out!
This post is about the Linux text console – not X or Wayland. We’re going to get the console right without using those systems. These instructions are for Debian trixie, but should be broadly applicable elsewhere also. The end result can look like this:
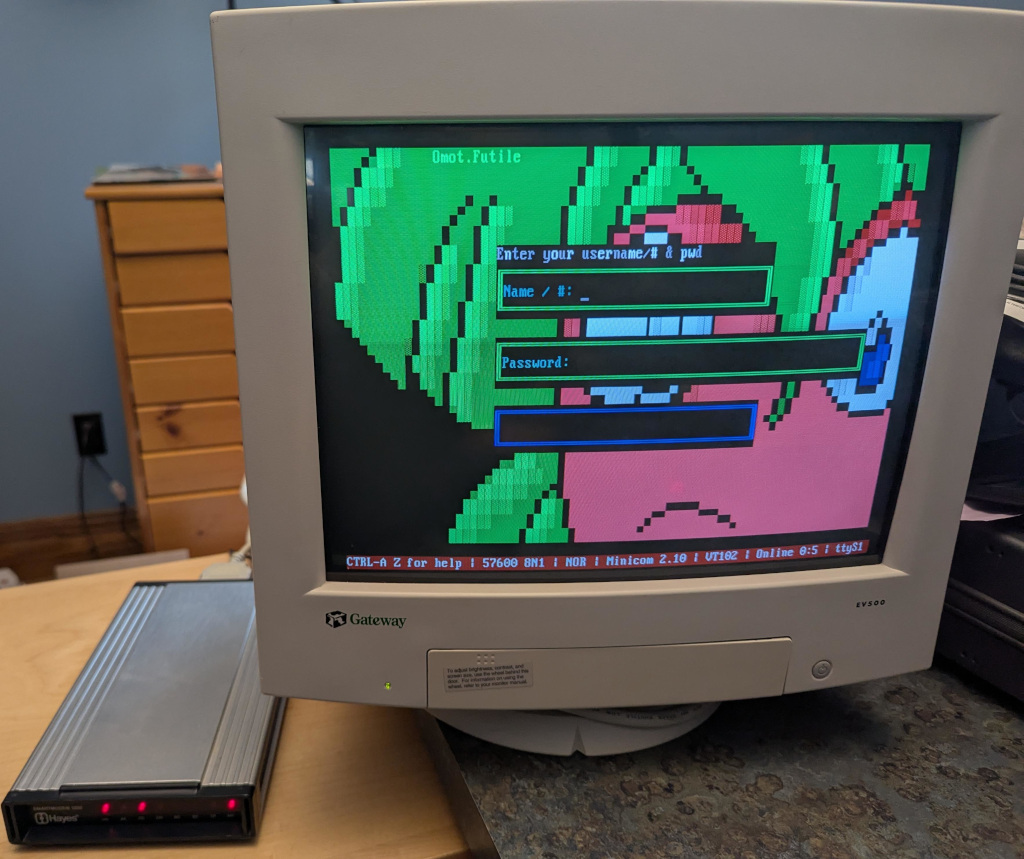
(That’s a Wifi Retromodem that I got at VCFMW last year in the Hayes modem case)
What’s a pixel?
How would you define a “pixel” these days? Probably something like “a uniquely-addressable square dot in a two-dimensional grid”.
In the world of VGA and CRTs, that was just a logical abstraction. We got an API centered around that because it was convenient. But, down the VGA cable and on the device, that’s not what a pixel was.
A pixel, back then, was a time interval. On a multisync monitor, which were common except in the very early days of VGA, the timings could be adjusted which produced logical pixels of different sizes. Those screens often had a maximum resolution but not necessarily a “native resolution” in the sense that an LCD panel does. Different timings produced different-sized pixels with equal clarity (or, on cheaper monitors, equal fuzziness).
A side effect of this was that pixels need not be square. And, in fact, in the standard DOS VGA 80x25 text mode, they weren’t.
You might be seeing why DVI, DisplayPort, and HDMI replaced VGA for LCD monitors: with a VGA cable, you did a pixel-to-analog-timings conversion, then the display did a timings-to-pixels conversion, and this process could be a bit lossy. (Hence why you sometimes needed to fill the screen with an image and push the “center” button on those older LCD screens)
(Note to the pedantically-inclined: yes I am aware that I have simplified several things here; for instance, a color LCD pixel is made up of approximately 3 sub-dots of varying colors, and that things like color eInk displays have two pixel grids with different sizes of pixels layered atop each other, and printers are another confusing thing altogether, and and and…. MOST PEOPLE THINK OF A PIXEL AS A DOT THESE DAYS, OK?)
What was DOS text mode?
We think of this as the “standard” display: 80 columns wide and 25 rows tall. 80x25. By the time Linux came along, the standard Linux console was VGA text mode – something like the 4th incarnation of text modes on PCs (after CGA, MDA, and EGA). VGA also supported certain other sizes of characters giving certain other text dimensions, but if I cover all of those, this will explode into a ridiculously more massive page than it already is.
So to display text on an 80x25 DOS VGA system, ultimately characters and attributes were written into the text buffer in memory. The VGA system then rendered it to the display as a 720x400 image (at 70Hz) with non-square pixels such that the result was approximately a 4:3 aspect ratio.
The font used for this rendering was a bitmapped one using 8x16 cells. You might do some math here and point out that 8 * 80 is only 640, and you’d be correct. The fonts were 8x16 but the rendered cells were 9x16. The extra pixel was normally used for spacing between characters. However, in line graphics mode, characters 0xC0 through 0xDF repeated the 8th column in the position of the 9th, allowing the continuous line-drawing characters we’re used to from TUIs.
Problems rendering DOS fonts on modern systems
By now, you’re probably seeing some of the issues we have rendering DOS screens on more modern systems. These aren’t new at all; I remember some of these from back in the days when I ran OS/2, and I think also saw them on various terminals and consoles in OS/2 and Windows.
Some issues you’d encounter would be:
- Incorrect aspect ratio caused by using the original font and rendering it using 1:1 square pixels (resulting in a squashed appearance)
- Incorrect aspect ratio for ANOTHER reason, caused by failing to render column 9, resulting in text that is overall too narrow
- Characters appearing to be touching each other when they shouldn’t (failing to render column 9; looking at you, dosbox)
- Gaps between line drawing characters that should be continuous, caused by rendering column 9 as empty space in all cases
Character set issues
DOS was around long before Unicode was. In the DOS world, there were codepages that selected the glyphs for roughly the high half of the 256 possible characters. CP437 was the standard for the USA; others existed for other locations that needed different characters. On Unix, the USA pre-Unicode standard was Latin-1. Same concept, but with different character mappings.
Nowadays, just about everything is based on UTF-8. So, we need some way to map our CP437 glyphs into Unicode space. If we are displaying DOS-based content, we’ll also need a way to map CP437 characters to Unicode for display later, and we need these maps to match so that everything comes out right. Whew.
So, let’s get on with setting this up!
Selecting the proper video mode
As explained in my previous post, proper hardware support for DOS text mode is limited to x86 machines that do not use UEFI. Non-x86 machines, or x86 machines with UEFI, simply do not contain the necessary support for it. As these are now standard, most of the time, the text console you see on Linux is actually the kernel driving the video hardware in graphics mode, and doing the text rendering in software.
That’s all well and good, but it makes it quite difficult to actually get an 80x25 console.
First, we need to be running at 720x400. This is where I ran into difficulty last time. I realized that my laptop’s LCD didn’t advertise any video modes other than its own native resolution. However, almost all external monitors will, and 720x400@70 is a standard VGA mode from way back, so it should be well-supported.
You need to find the Linux device name for your device. You can look at the possible devices with ls -l /sys/class/drm. If you also have a GUI, xrandr may help too. But in any case, each directory under /sys/class/drm has a file named modes, and if you cat them all, you will eventually come across one with a bunch of modes defined. Drop the leading “card0” or whatever from the directory name, and that’s your device. (Verify that 720x400 is in modes while you’re at it.)
Now, you’re going to edit /etc/default/grub and add something like this to GRUB_CMDLINE_LINUX_DEFAULT:
video=DP-1:720x400@70
Of course, replace DP-1 with whatever your device is.
Now you can run update-grub and reboot. You should have a 720x400 display.
At first, I thought I had succeeded by using Linux’s built-in VGA font with that mode. But it looked too tall. After noticing that repeated 0s were touching, I got suspicious about the missing 9th column in the cells. stty -a showed that my screen was 90x25, which is exactly what it would show if I was using 8x16 instead of 9x16 cells. Sooo…. I need to prepare a 9x16 font.
Preparing a font
Here’s where it gets complicated.
I’ll give you the simple version and the hard mode.
The simple mode is this: Download https://www.complete.org/downloads/CP437-VGA.psf.gz and stick it in /usr/local/etc, then skip to the “Activating the font” section below.
The font assembled here is based on the Ultimate Oldschool PC Font Pack v2.2, which is (c) 2016-2020 VileR and licensed under Creative Commons Attribution-ShareAlike 4.0 International License. My psf file is derived from this using the instructions below.
Building it yourself
First, install some necessary software: apt-get install fontforge bdf2psf
Start by going to the Oldschool PC Font Pack Download page. Download oldschool_pc_font_pack_v2.2_FULL.zip and unpack it.
The file we’re interested in is otb - Bm (linux bitmap)/Bm437_IBM_VGA_9x16.otb. Open it in fontforge by running fontforge BmPlus_IBM_VGA_9x16.otb. When it asks if you will load the bitmap fonts, hit select all, then yes. Go to File -> generate fonts. Save in a BDF, no need for outlines, and use “guess” for resolution.
Now you have a file such as Bm437_IBM_VGA_9x16-16.bdf. Excellent.
Now we need to generate a Unicode map file. We will make sure this matches the system’s by enumerating every character from 0x00 to 0xFF, converting it from CP437 to Unicode, and writing the appropriate map.
Here’s a Python script to do that:
for i in range(0, 256):
    cp437b = b'%c' % i
    uni = ord(cp437b.decode('cp437'))
    print(f"U+{uni:04x}")
Save that file as genmap.py and run python3 genmap.py > cp437-uni.
Now, we’re ready to build the psf file:
bdf2psf --fb Bm437_IBM_VGA_9x16-16.bdf \
  /dev/null cp437-uni 256 CP437-VGA.psf
By convention, we normally store these files gzipped, so gzip CP437-VGA.psf.
You can test it on the console with setfont CP437-VGA.psf.gz.
Now copy this file into /usr/local/etc.
Activating the font
Now, edit /etc/default/console-setup. It should look like this:
# CONFIGURATION FILE FOR SETUPCON

# Consult the console-setup(5) manual page.

ACTIVE_CONSOLES="/dev/tty[1-6]"

CHARMAP="UTF-8"

CODESET="Lat15"
FONTFACE="VGA"
FONTSIZE="8x16"
FONT=/usr/local/etc/CP437-VGA.psf.gz

VIDEOMODE=

# The following is an example how to use a braille font
# FONT='lat9w-08.psf.gz brl-8x8.psf'
At this point, you should be able to reboot. You should have a proper 80x25 display! Log in and run stty -a to verify it is indeed 80x25.
Using and testing CP437
Part of the point of CP437 is to be able to access BBSs, ANSI art, and similar.
Now, remember, the Linux console is still in UTF-8 mode, so we have to translate CP437 to UTF-8, then let our font map translate it back to CP437. A weird trip, but it works.
Let’s test it using the Textfiles ANSI art collection. In the artworks section, I randomly grabbed a file near the top: borgman.ans. Download that, and display with:
clear; iconv -f CP437 -t UTF-8 < borgman.ans
You should see something similar to – but actually more accurate than – the textfiles PNG rendering of it, which you’ll note has an incorrect aspect ratio and some rendering issues. I spot-checked with a few others and they seemed to look good. belinda.ans in particular tries quite a few characters and should give you a good sense if it is working.
Use with interactive programs
That’s all well and good, but you’re probably going to want to actually use this with some interactive program that expects CP437. Maybe Minicom, Kermit, or even just telnet?
For this, you’ll want to apt-get install luit. luit maps CP437 (or any other encoding) to UTF-8 for display, and then of course the Linux console maps UTF-8 back to the CP437 font.
Here’s a way you can repeat the earlier experiment using luit to run the cat program:
clear; luit -encoding CP437 cat borgman.ans
You can run any command under luit. You can even run luit -encoding CP437 bash if you like. If you do this, it is probably a good idea to follow my instructions on generating locales on my post on serial terminals, and then within luit, set LANG=en_us.IBM437. But note especially that you can run programs like minicom and others for accessing BBSs under luit.
Final words
This gave you a nice DOS-type console. Although it doesn’t have glyphs for many codepoints, it does run in UTF-8 mode and therefore is compatible with modern software.
You can achieve greater compatibility with more UTF-8 codepoints with the DOS font, at the expense of accuracy of character rendering (especially for the double-line drawing characters) by using /usr/share/bdf2psf/standard.equivalents instead of /dev/null in the bdf2psf command.
Or you could go for another challenge, such as using the DEC vt-series fonts for coverage of ISO-8859-1. But just using fonts extracted from DEC ROM won’t work properly, because DEC terminals had even more strangeness going on than DOS fonts.
